

Understanding a Flower’s Anatomy for Pressing.
Before you begin pressing your flowers, it’s a good idea to have a basic understanding of a flower’s anatomy. This way you can discern which parts of the flower to press intact and which you can remove or deconstruct to reduce the bulk of the flower. By reducing the bulk of the flower, you’re also reducing how hard the flower and your press is having to work to expel moisture. The more layers of the flower; the more moisture.
Begin by examining the shape and anatomy of your flower and consider which parts you can remove to press separately and how best to deconstruct it.
*This information is meant as a basic, general overview. For more detailed information on pressing, explore our online courses and guide books.*
Examine the parts of your flowers before placing them into the press.
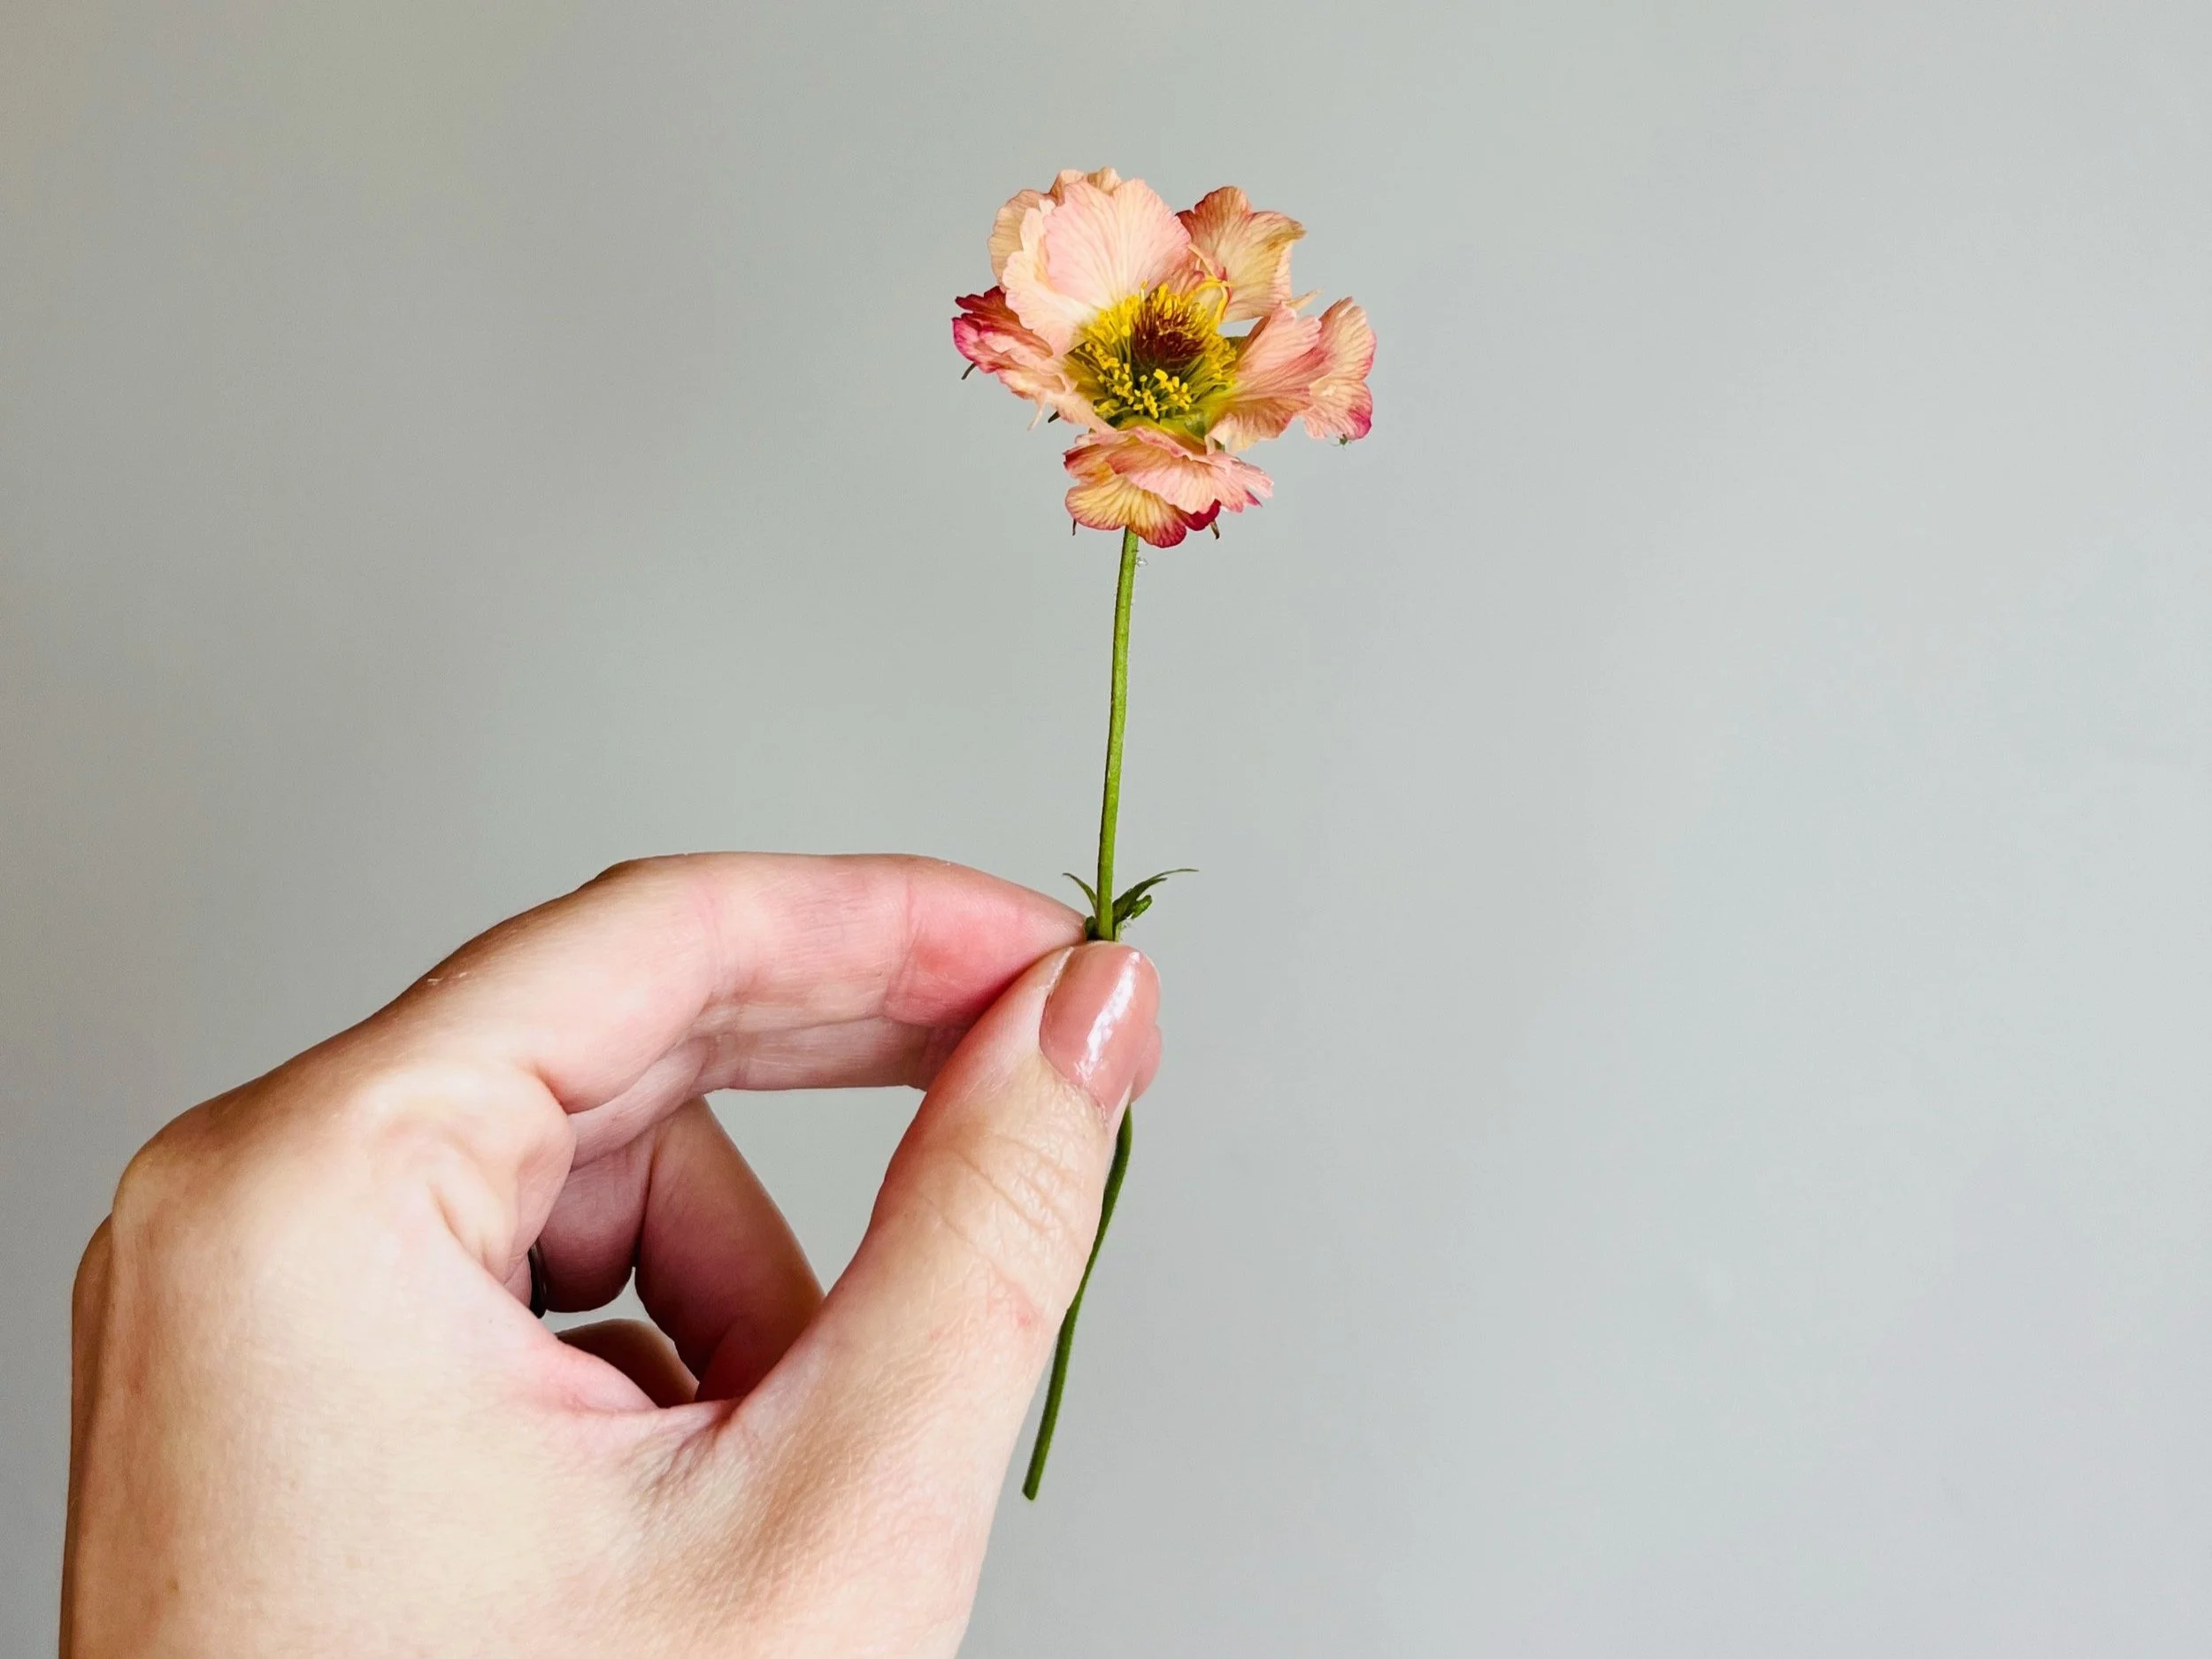
Pistils and Stamen
A number of flowers can have very pronounced stamen or a pistil, which protrudes from the centre of the flower. The stamen can also be covered in pollen, which can become messy and stain your petals. You can of course press them whole with the flower, but they are also more likely to leave an impression on delicate petals too.
In some flowers the stamen are shorter or buried within the petals. If they’re not a distinctive feature of the flower, removing them can help to reduce the bulk of your flower for pressing. In cases such as roses, if you’re pressing the rose but can’t see the centre (such as side-on) then you may want to pick out the centre stamen to reduce the flower. If you’re deconstructing the flower, you can press the centre separately by releasing the petals and cutting the centre away from the stem. There’s more detailed information on this in the guidebook ‘How to Press Roses and Trickier Flowers’ or our online course.
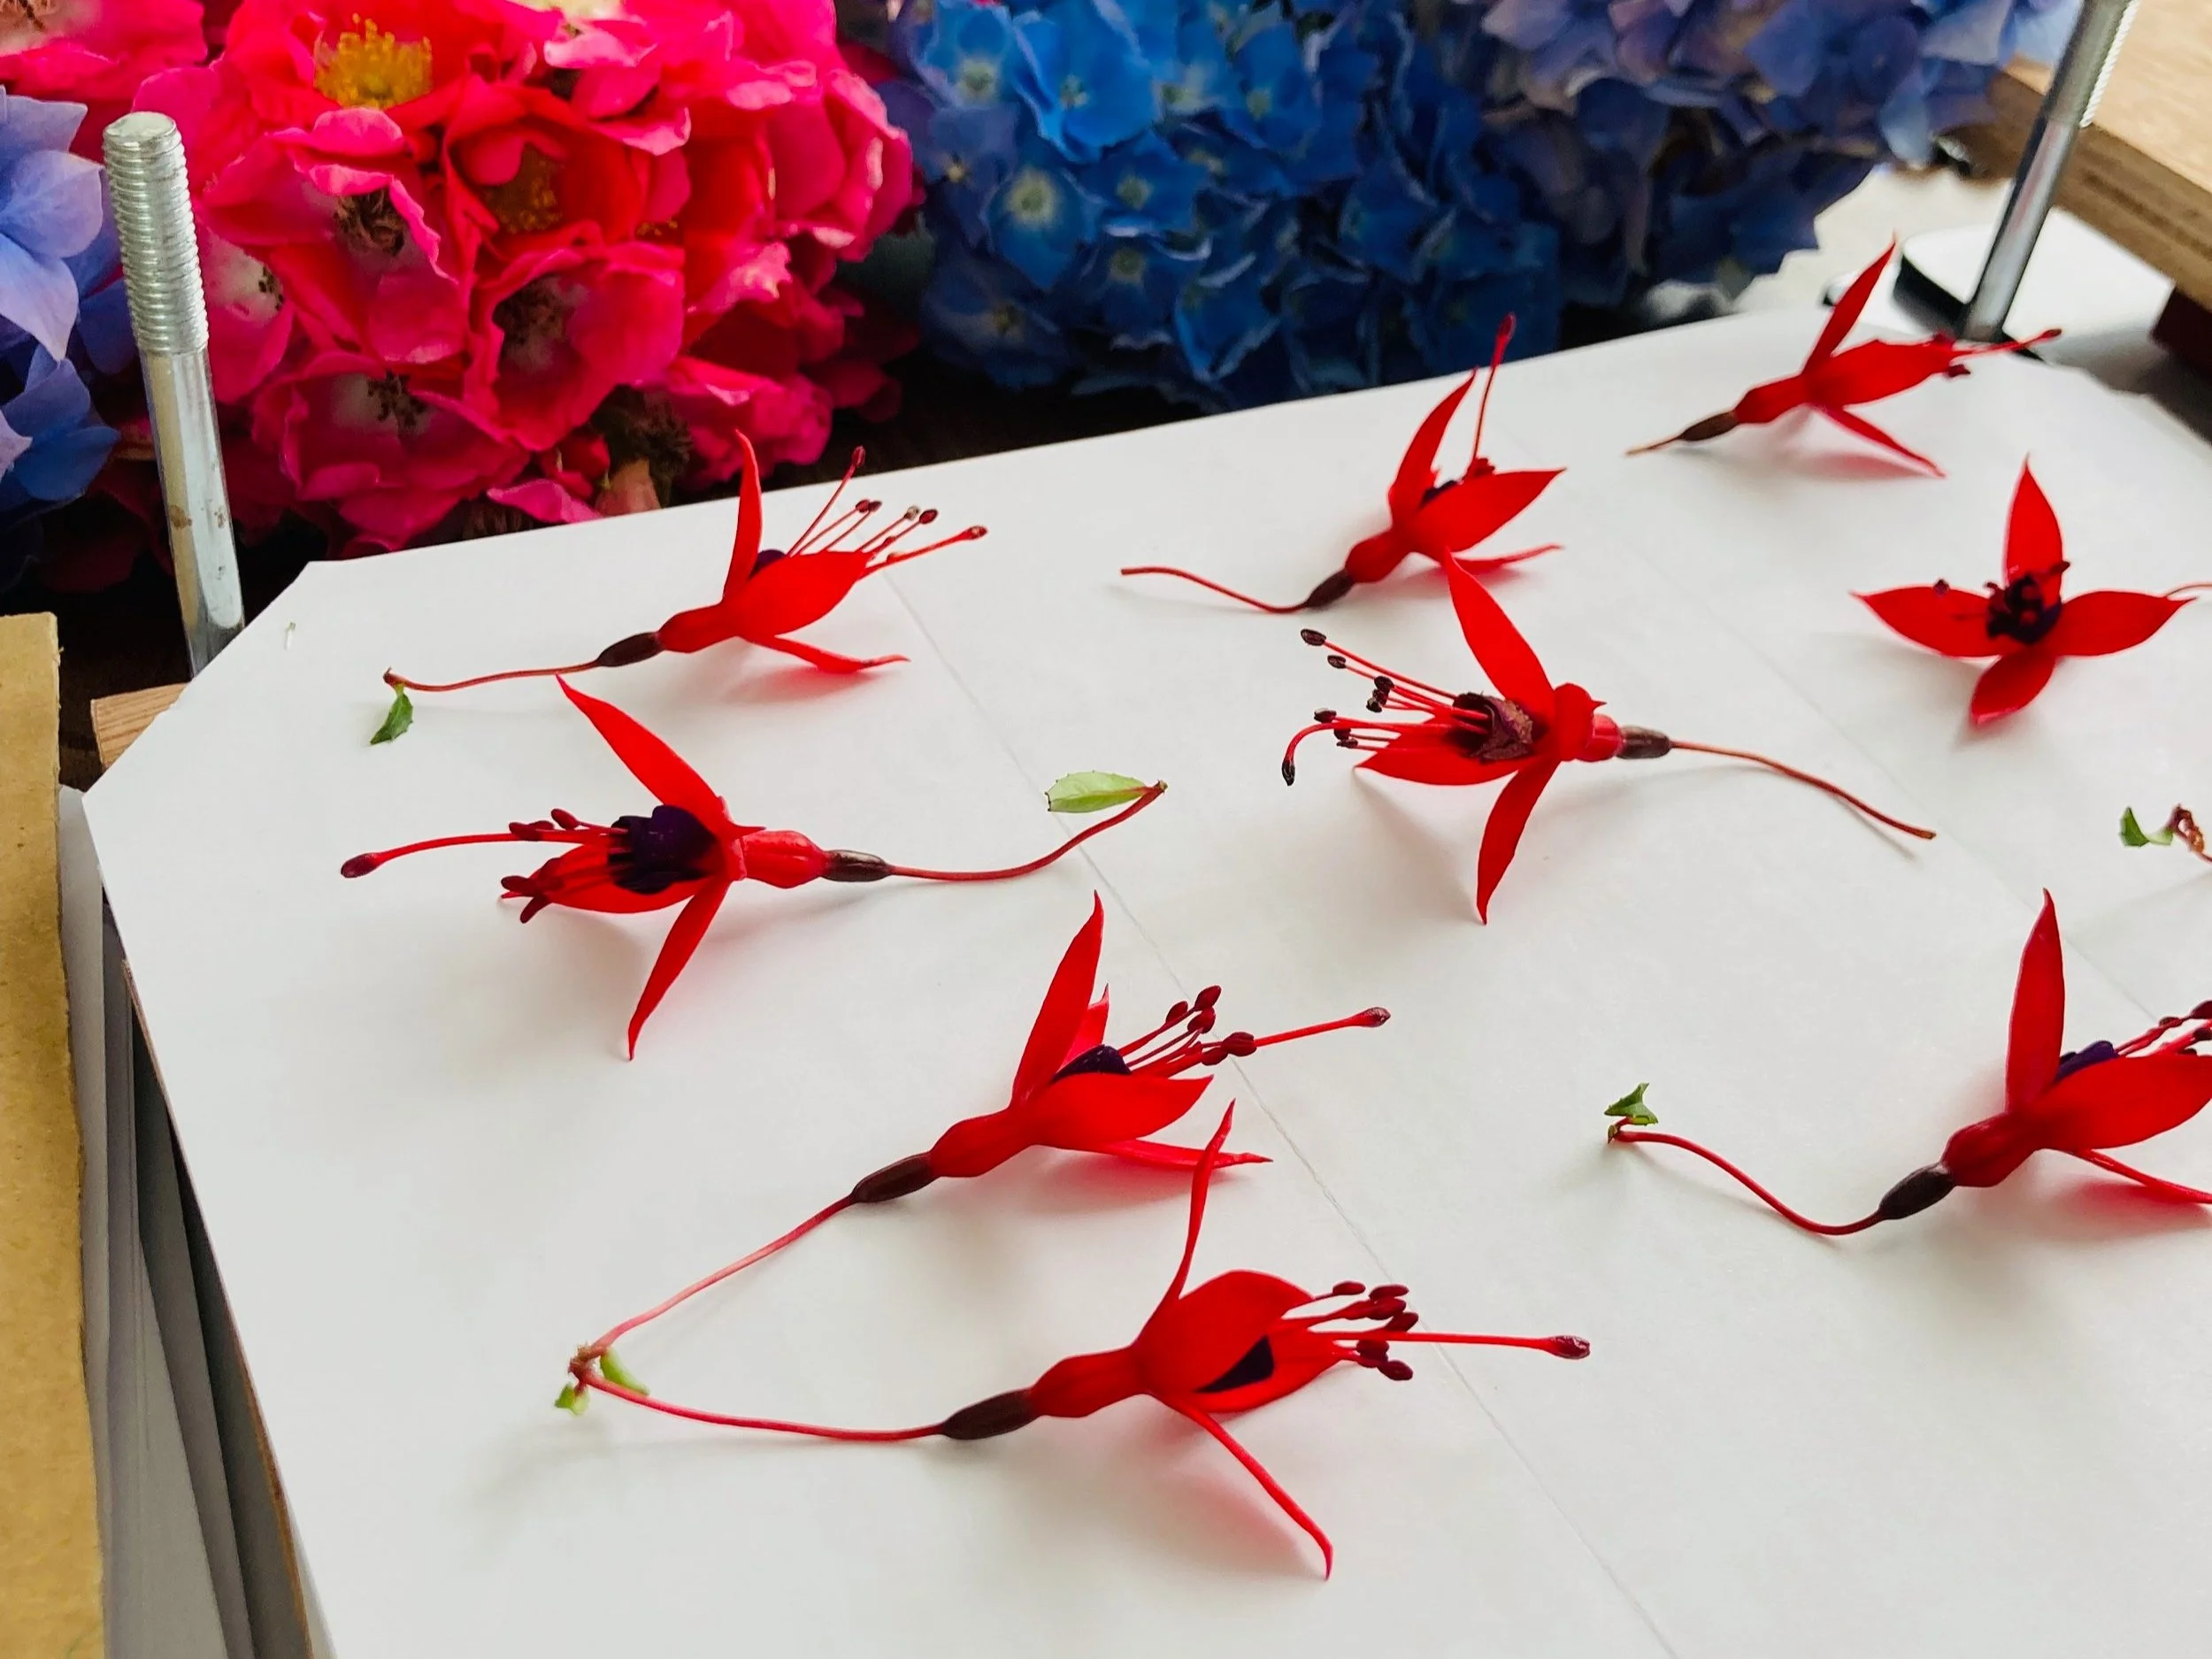
If the stamen and/or pistils are quite pronounced, use scissors to cut them away and press these parts of the flower separately; you can then reassemble the flower after pressing, particularly if they’re a distinctive feature, such as lilies, fuchsia and orchids.
Some pistils and stamen are a distinctive part of the flower.
Calyx and Sepals
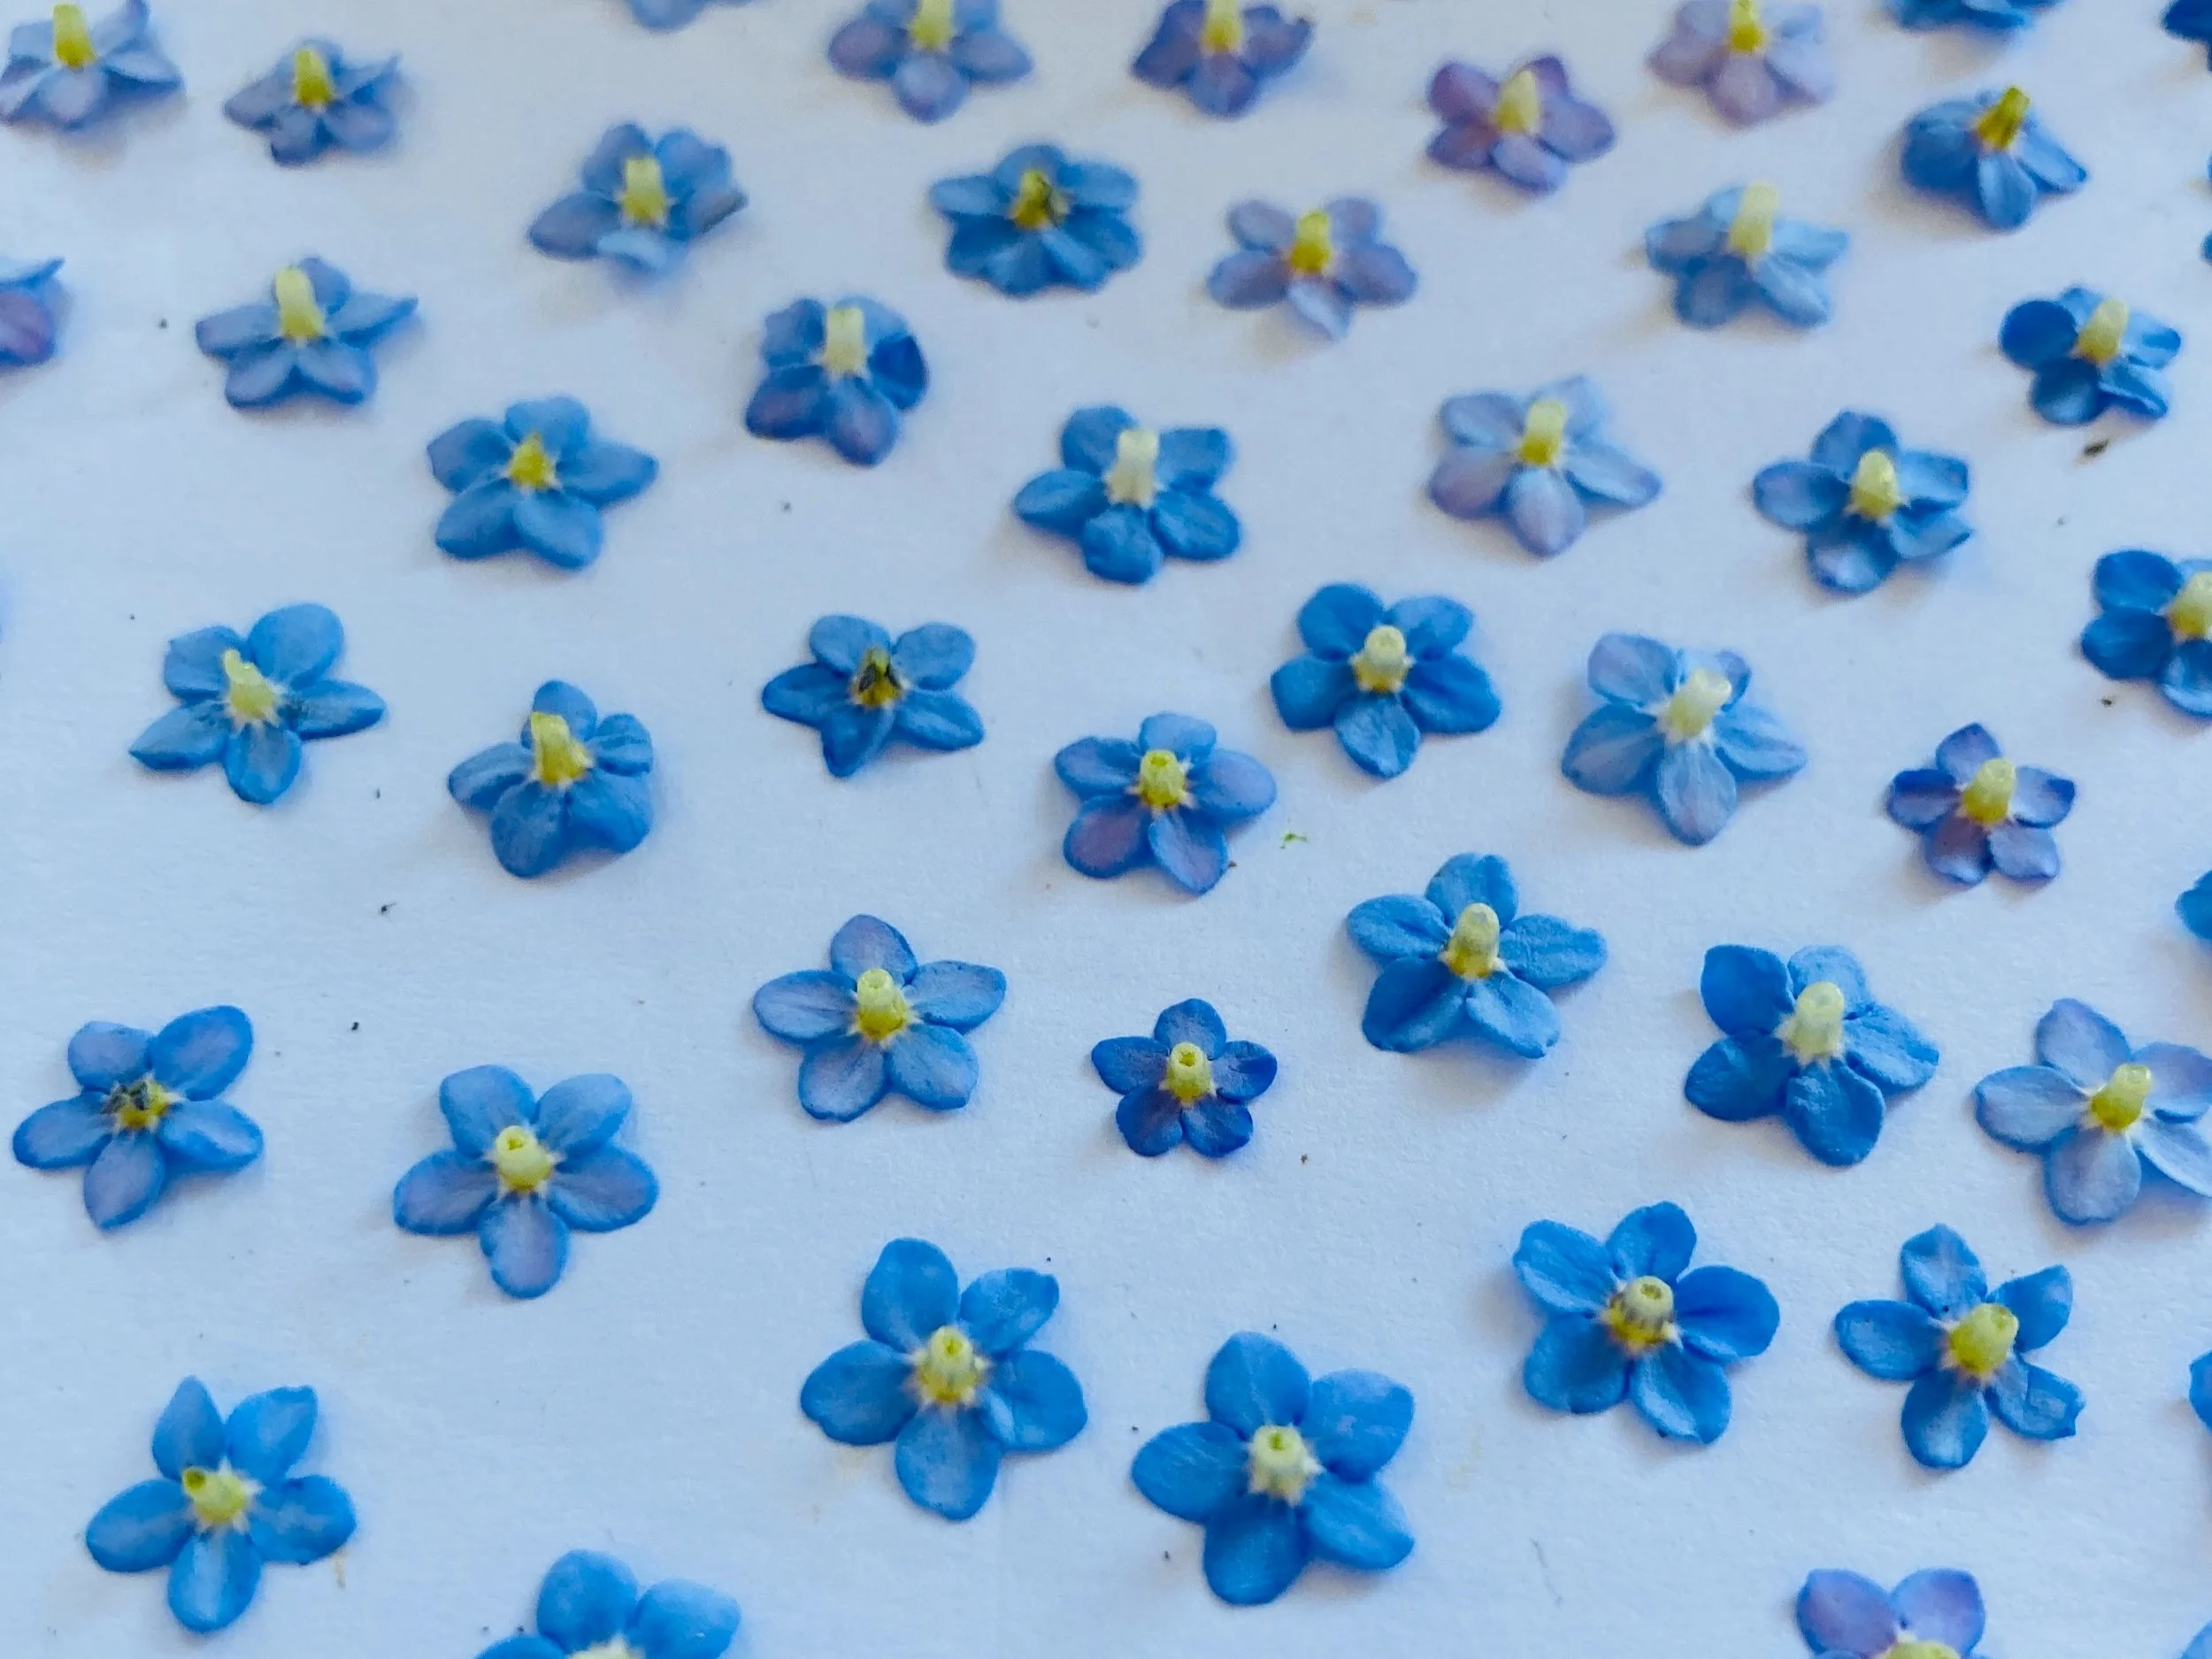
Some flowers have a group of sepals which are collectively called the calyx; they sometimes resemble leaves and surround the more colourful petals. They can also act as an almost cup-like structure which holds the petals and inner parts of the flower, for example in forget-me-nots and carnations.
Sometimes pressing the flower with the calyx or sepals can deform the flower, so that it presses at an angle for example, rather than perfectly open and flat. If the petals are quite light in colour, a calyx or sepals can also show through and cause the flower to look darker or lose the bright colour of the petals you’re trying to retain.
By removing the sepals or calyx you can often release the petals so you can focus on just the petals. You can always reconstruct the flower after pressing if the calyx or sepals are a distinctive feature of your flower.
Remove the calyx for an even pressing and open-faced effect.
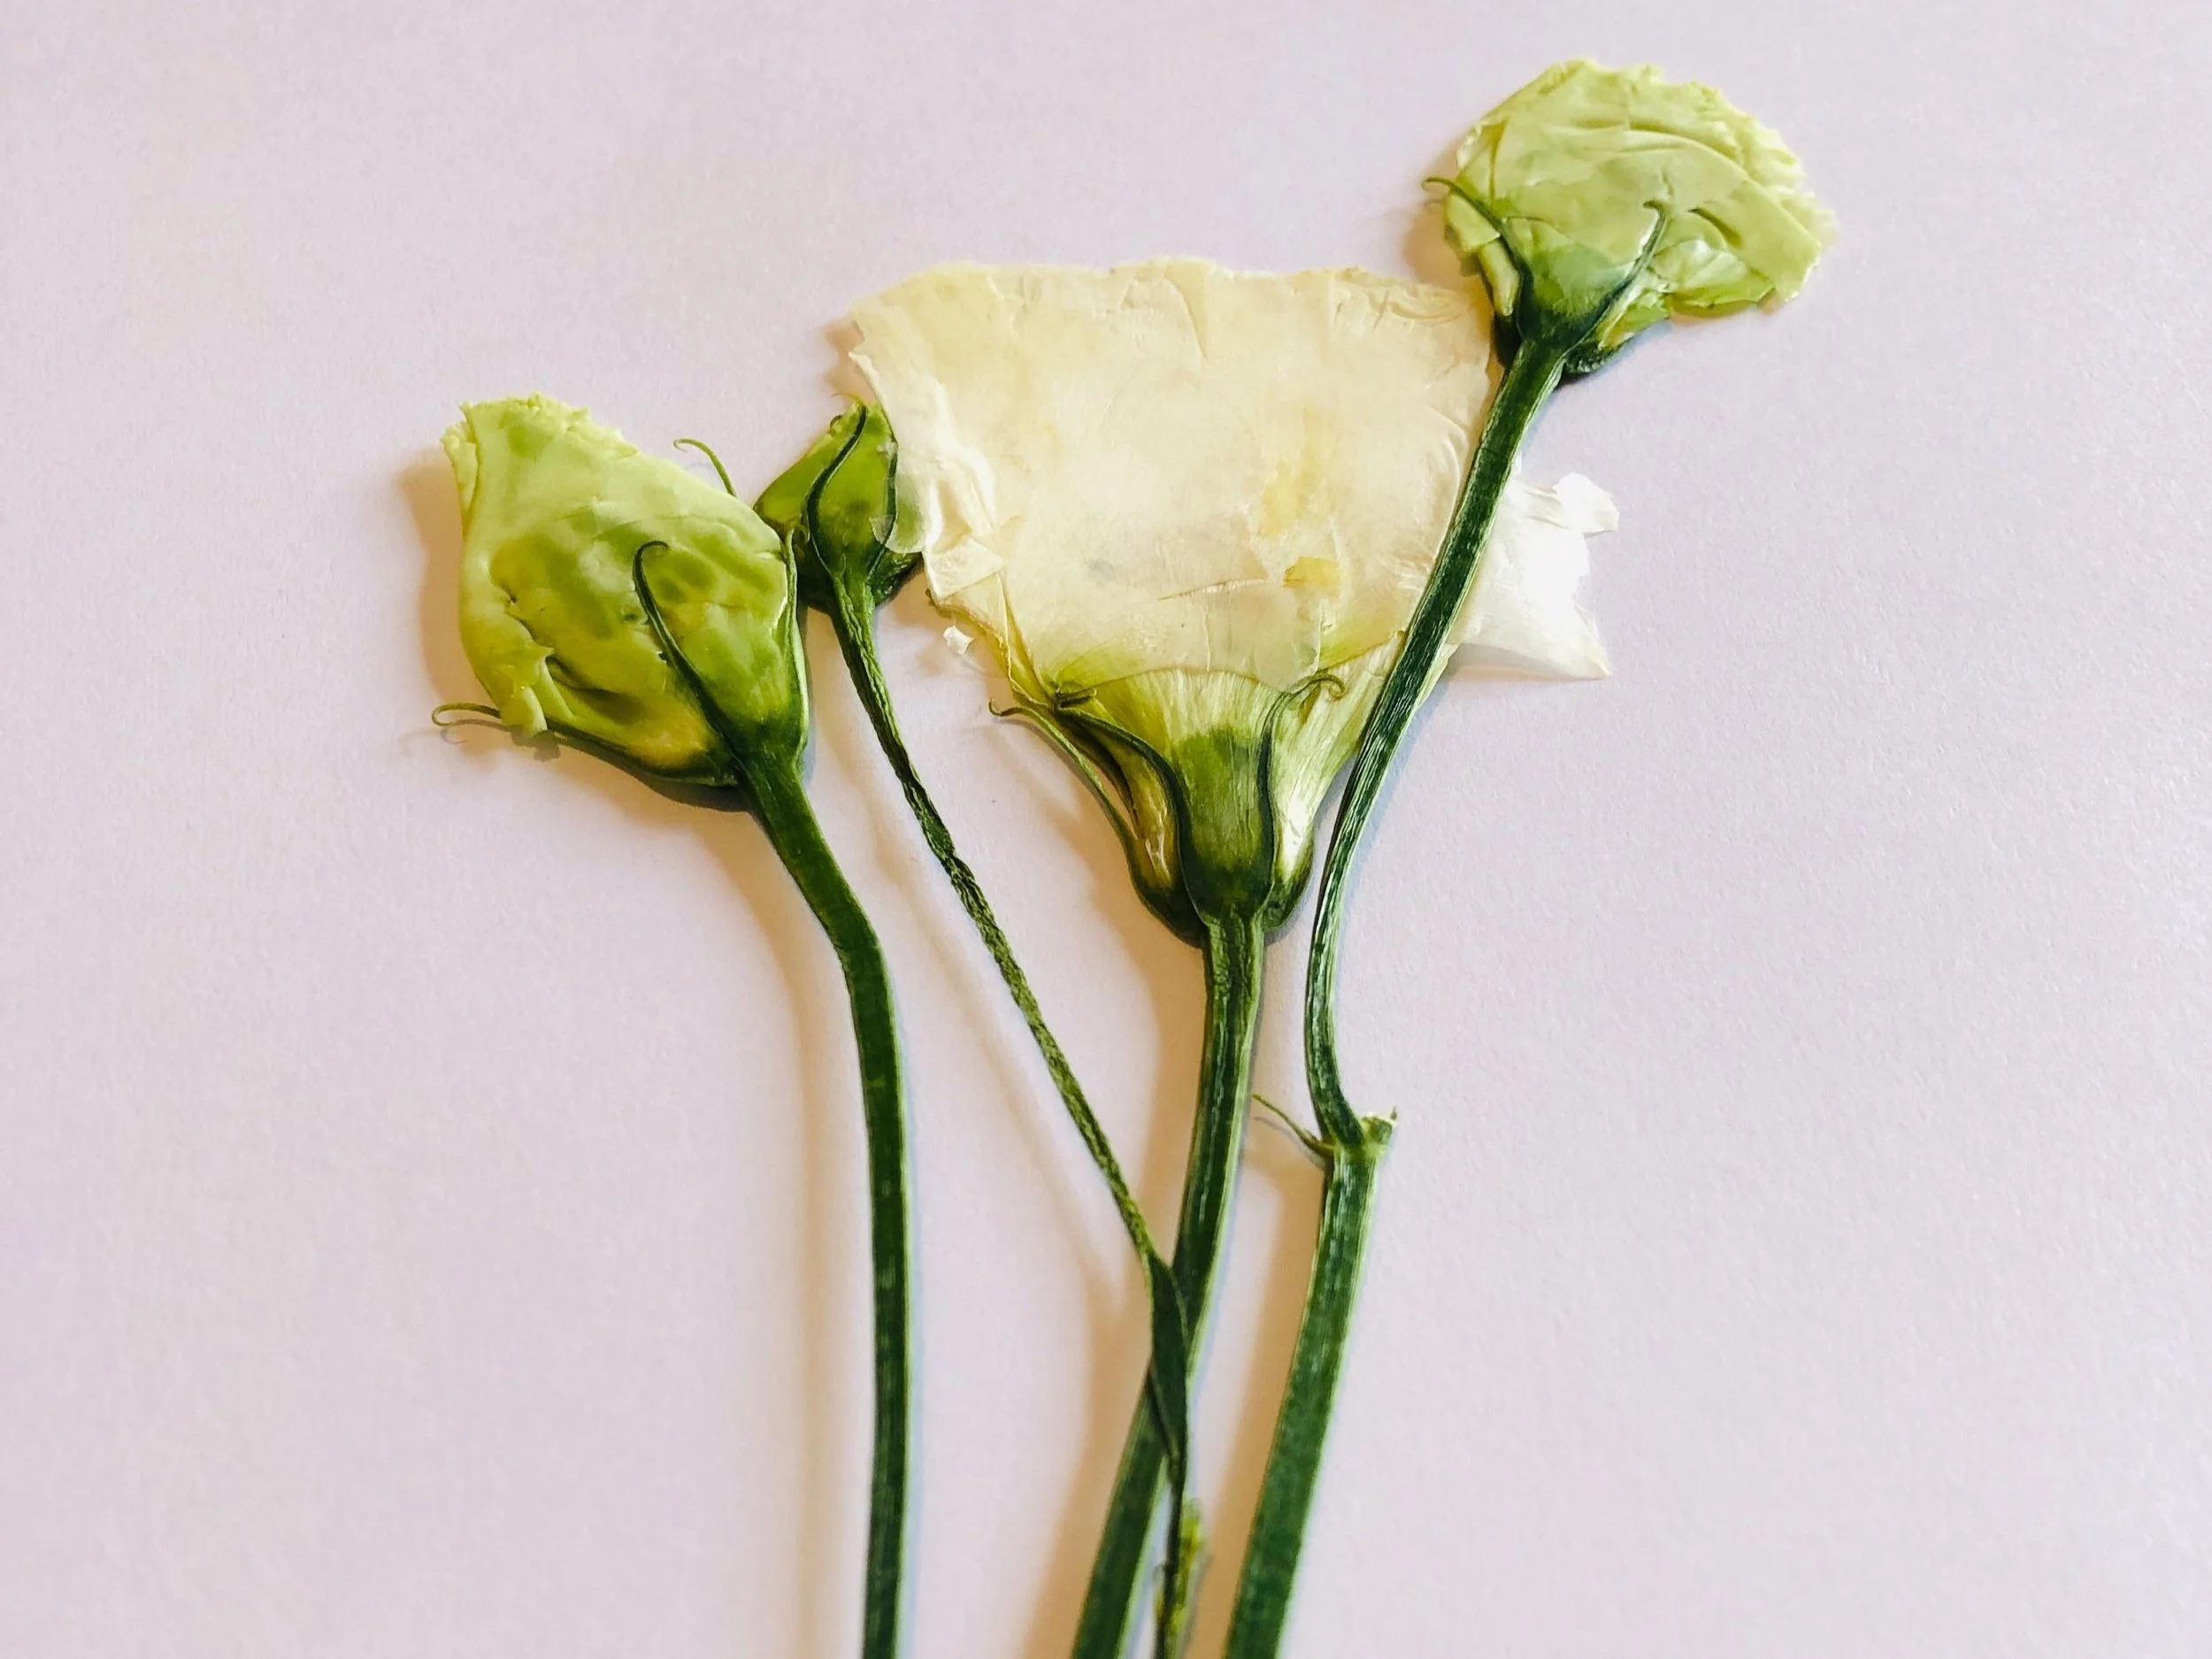
Receptacle and Stem
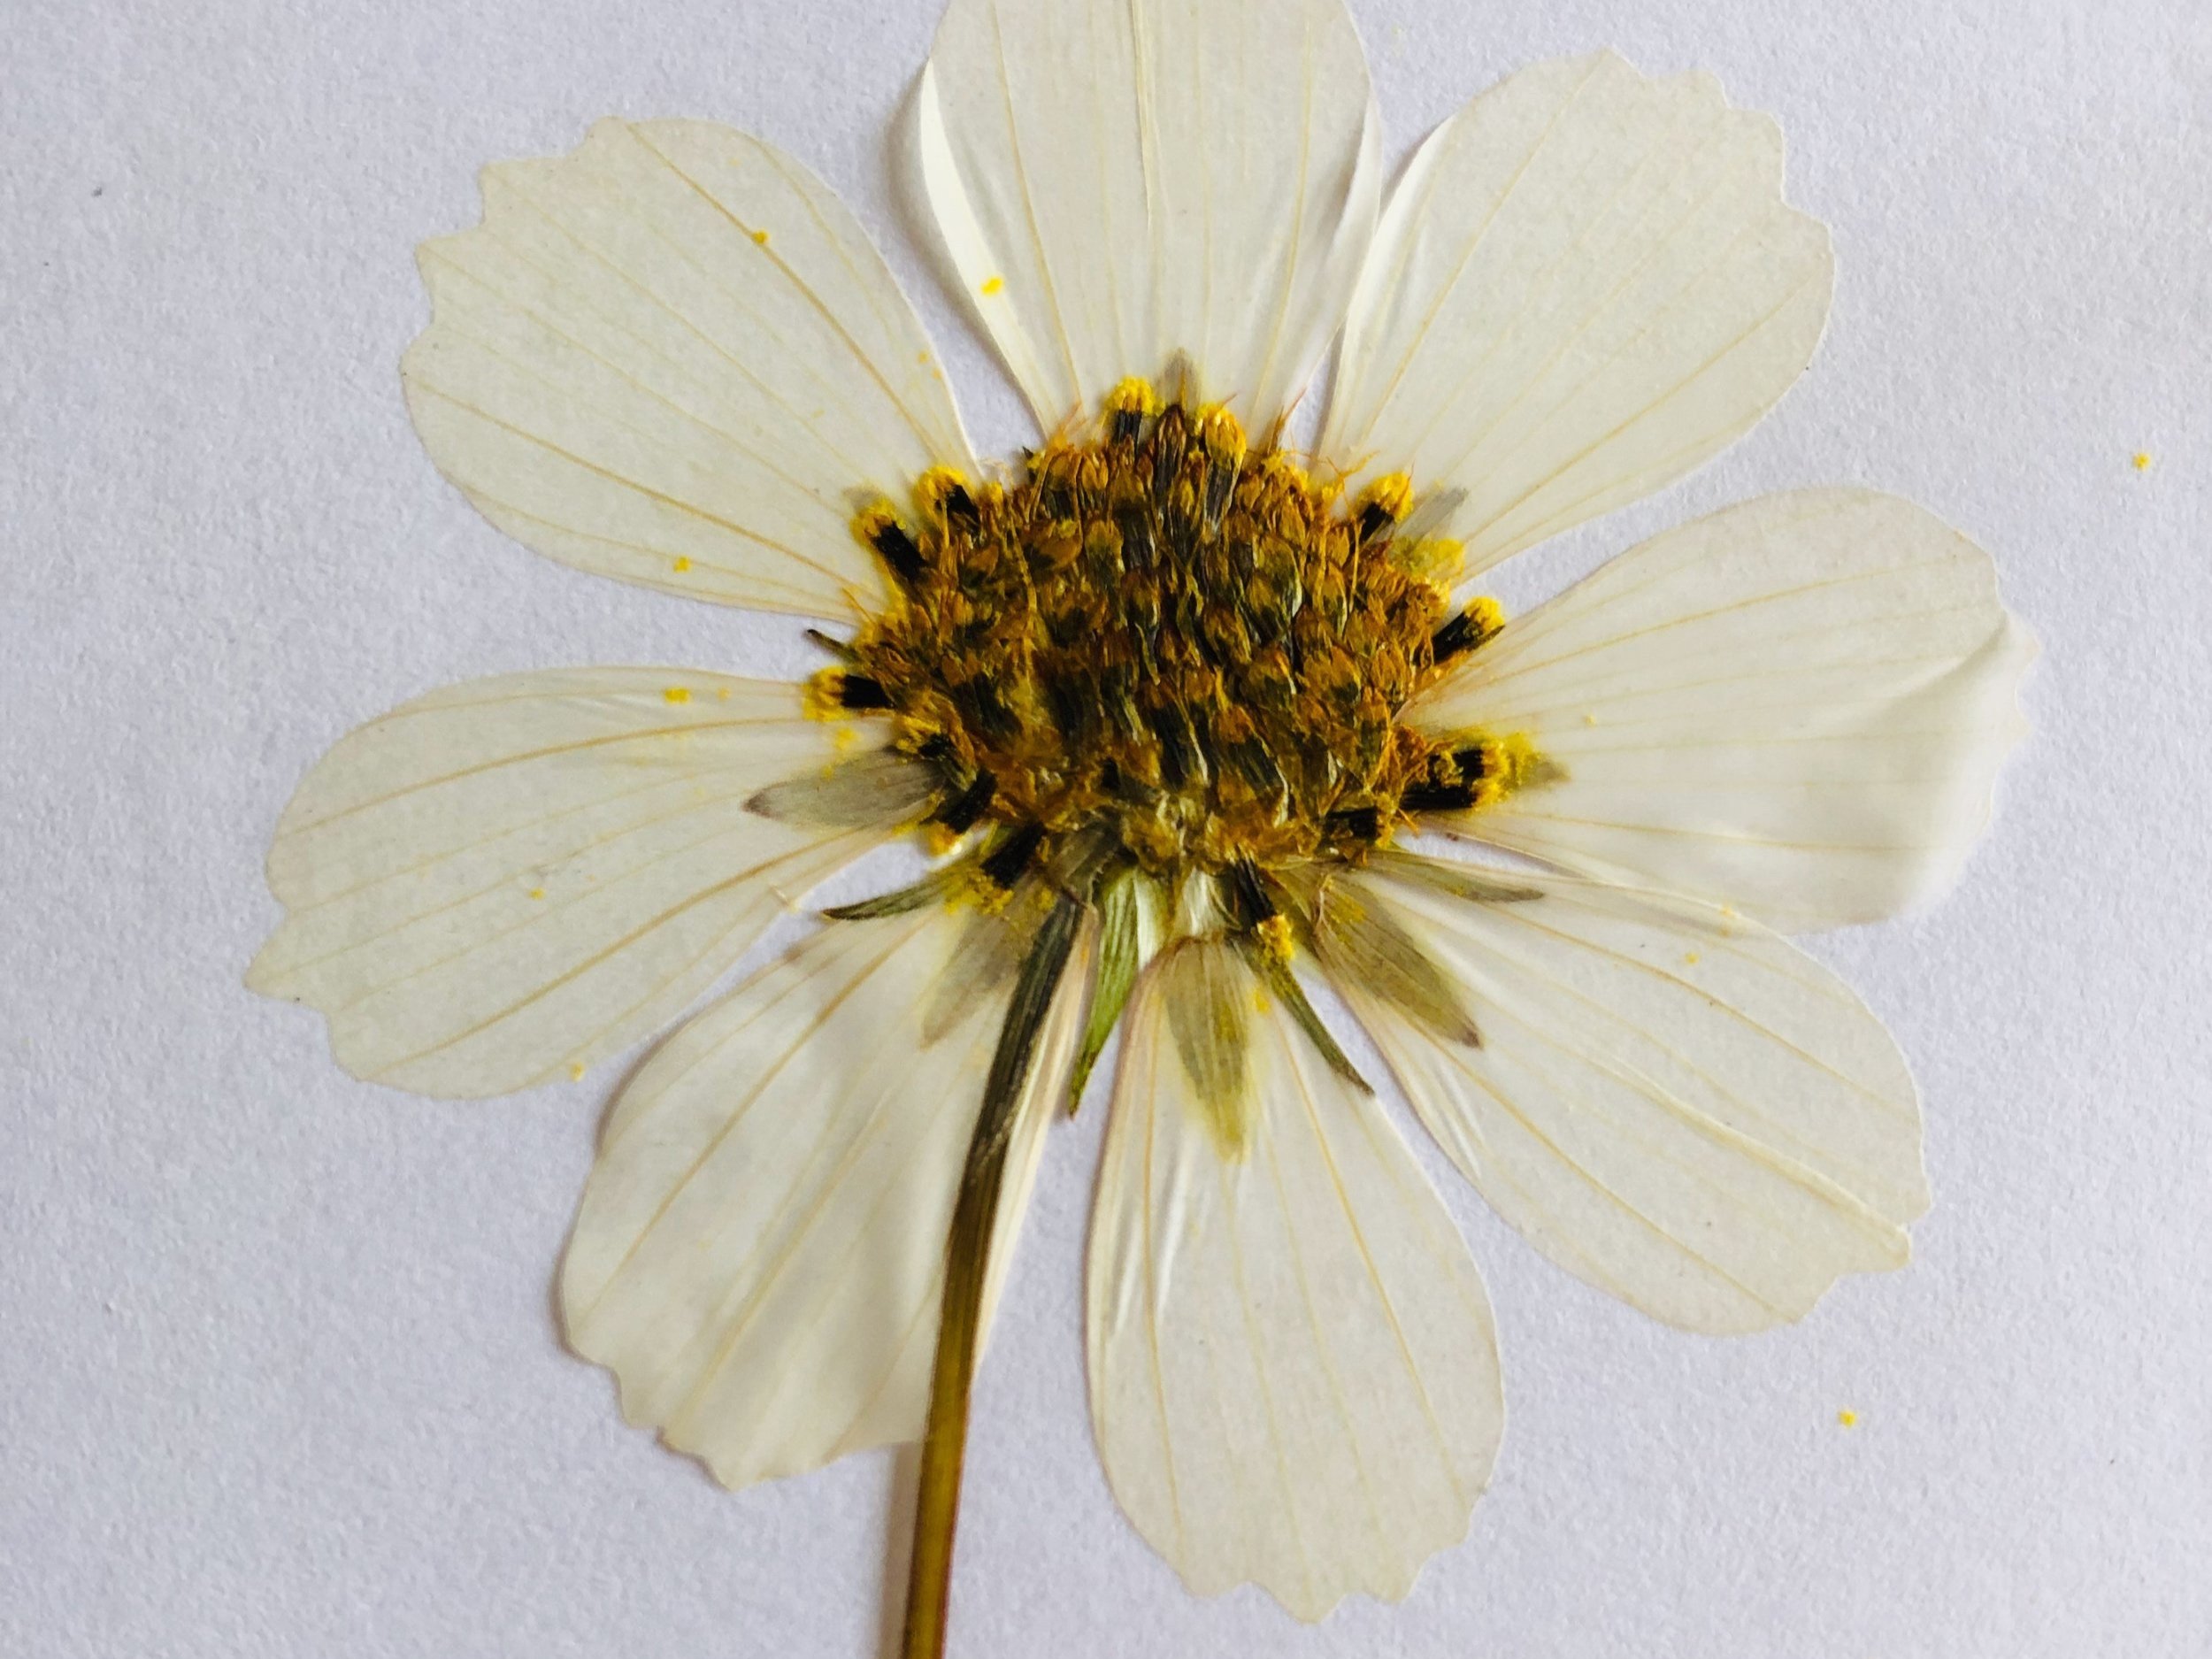
The receptacle of a flower joins the centre and the parts of the flower (the sepals/calyx, stamen and pistils, and petals) with the stem. It can be quite a thick part of the flower, which means it can also retain a lot of moisture. Because it’s often the thickest part of the flower, you’ll need to ensure your press has plenty of pressure against this part of the flower, alongside good contact with the petals, so the flower can dry out evenly.
Before pressing your flowers, consider whether you would like to keep your stem attached during pressing, or remove it. Any petals pressed alongside a stem - particularly for thinner flowers like cosmos or viola - are more likely to wither because they won’t receive the same contact with the pages inside your press or the same pressure. Removing the stem and pressing it separately can help you to achieve a lovely, open-faced effect and you can always reattach the stem once it has dried.
For very thick stems, apply a lot of pressure in your press and use wooden dividers to increase the stability and prevent the stem warping your papers and cardboard dividers. You can also cut stems in half, though this leaves them more vulnerable to browning due to the exposure of moisture.
Flowers can be pressed alongside stems, or removed and pressed separately.
Leaves
Try not to overlook leaves and foliage for pressing: they add beautiful texture to a composition but can also be a distinctive part of a flower.
Remove any leaves which may overlap your petals or are in the way of really showing off your flower. You can press these separately and reattach once they’re dried out.
The front of a leaf (or the adaxis) may look different to the back of the leaf (or abaxis) and some can have a distinguishing midrib (the vein running through the centre of the leaf). You can press individual leaves or bunches of them joined together by the petiole (which connects a leaf to the stem). Try to avoid leaves with rust, black spot or other signs of damage.
Preserving these features of a leaf can be as satisfying as preserving a flower, so try not to discard them.
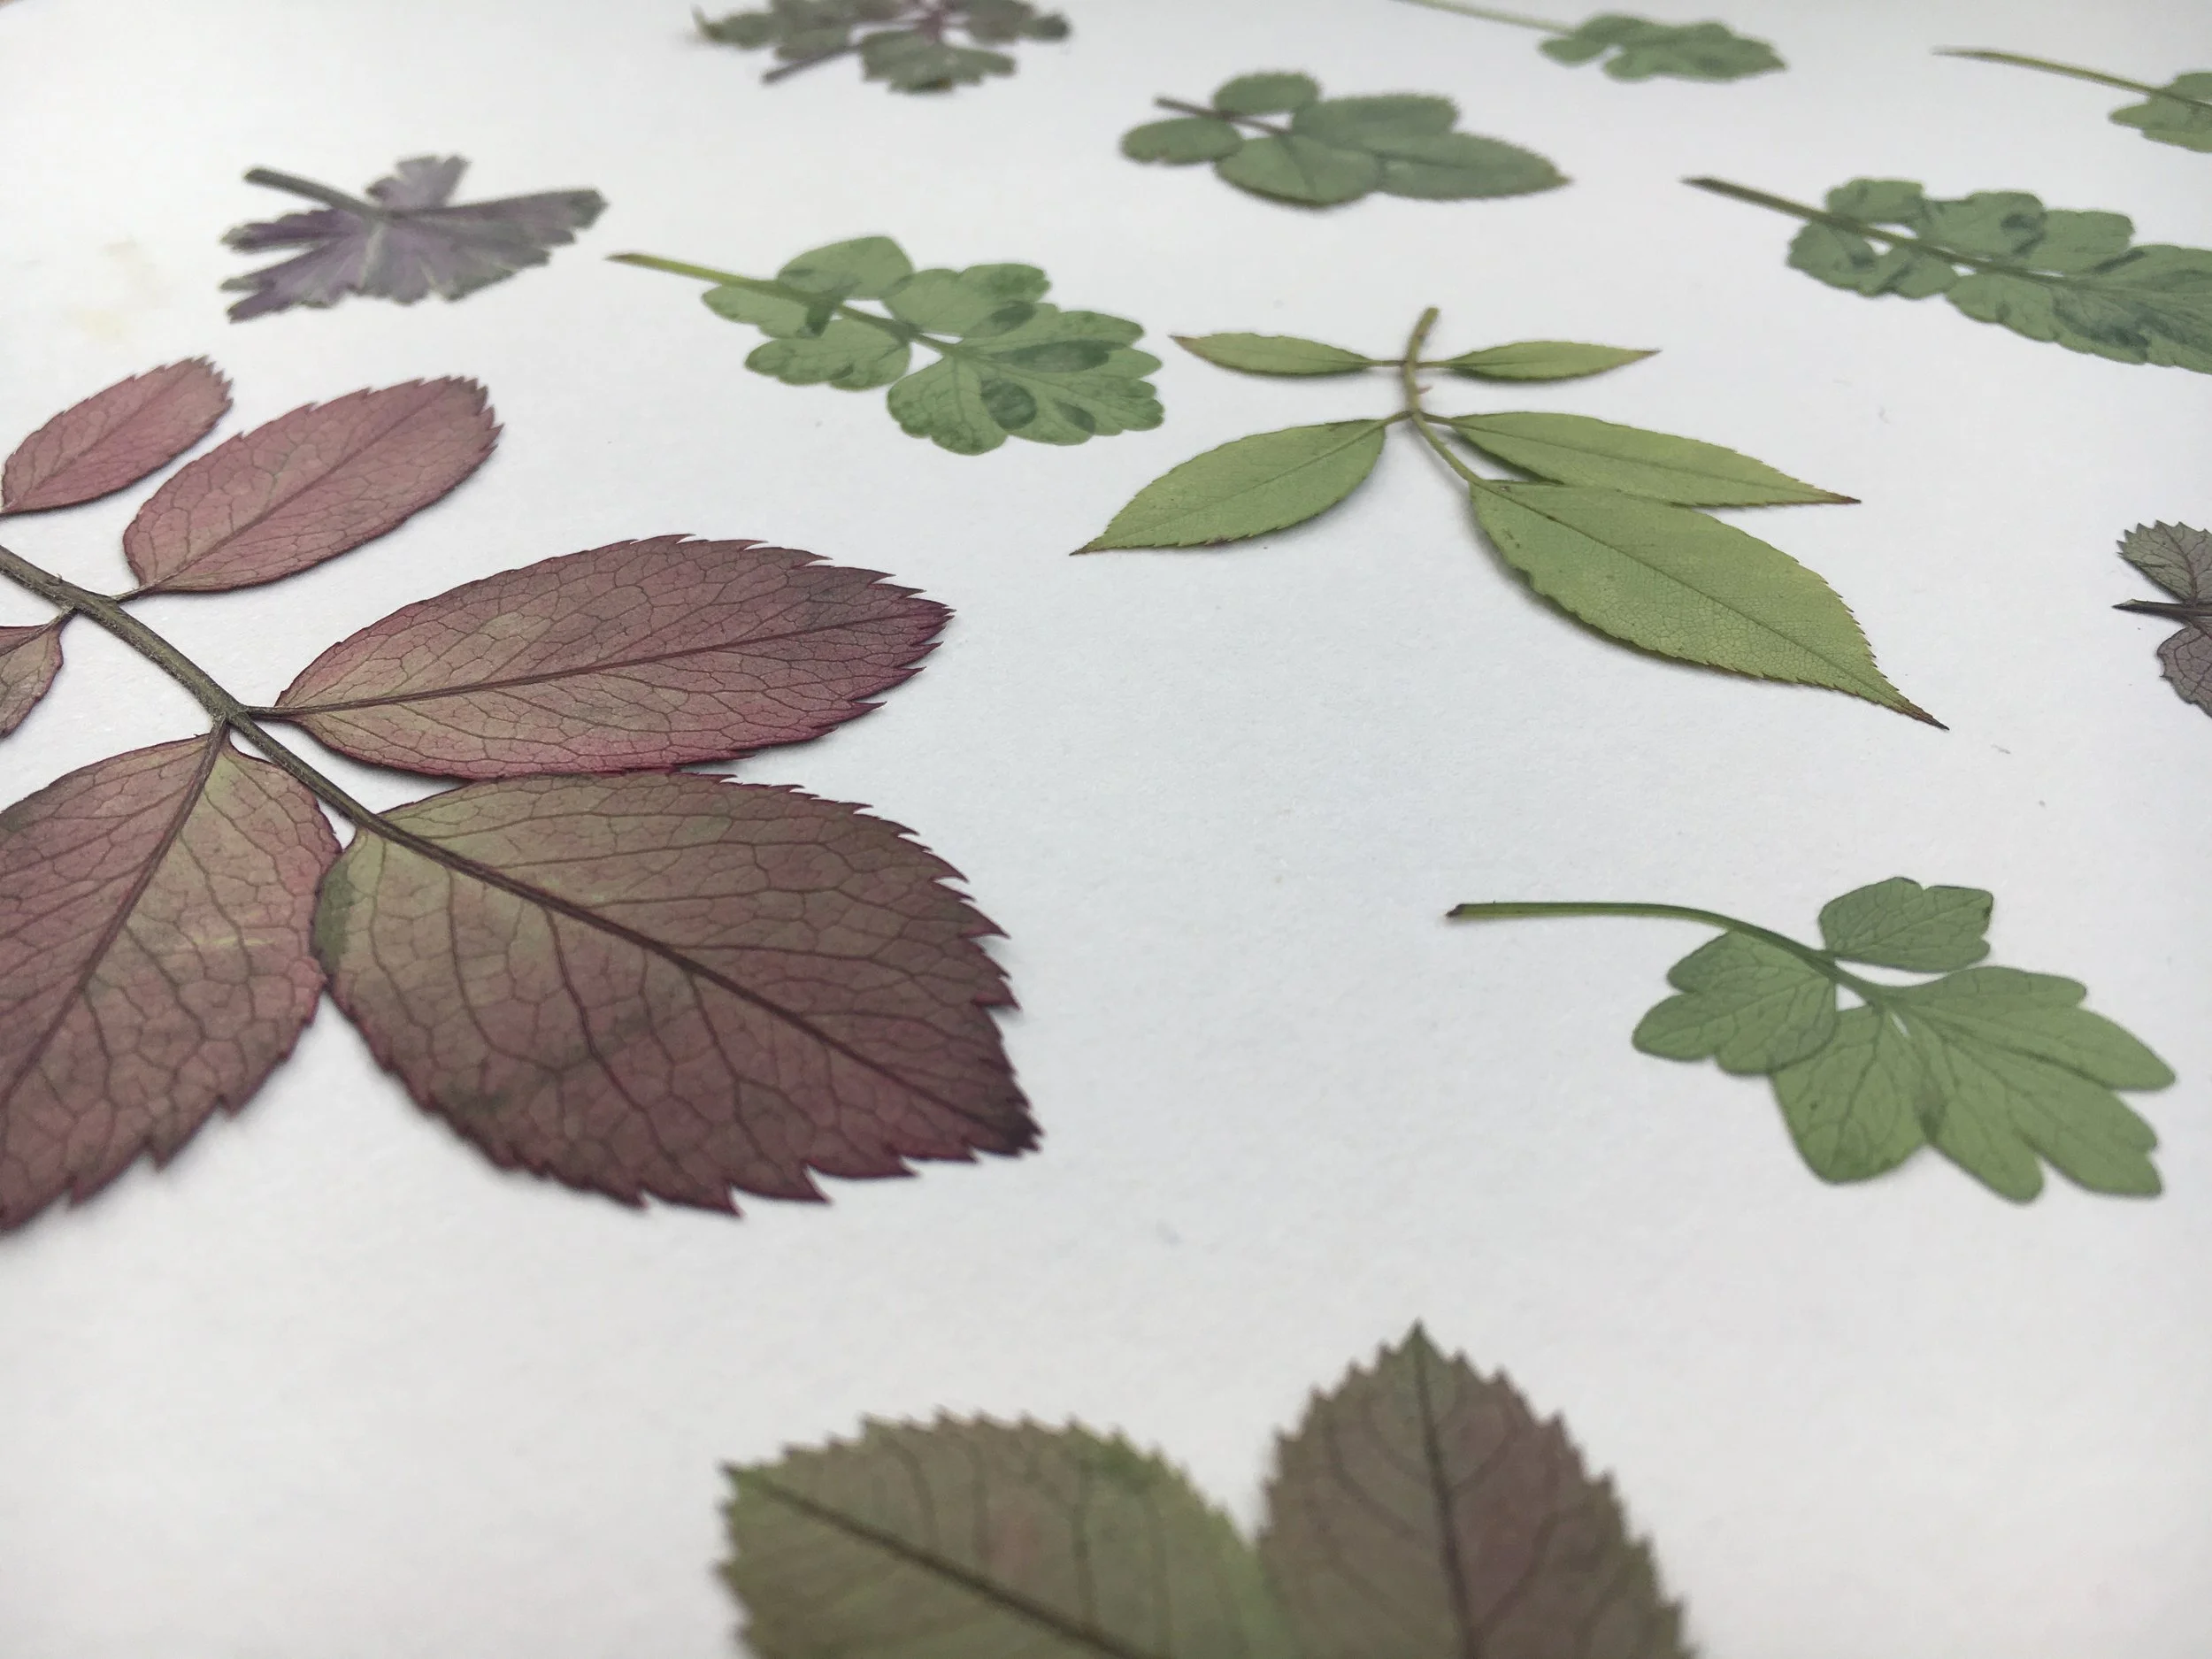
Try not to overlook leaves and foliage when pressing.
Buds
Some flowers may have a budding flower attached at different parts of the stem; it may be very close to the flower or further down the stem.
You can press buds attached to the stem, or remove them and press them separately; just bear in mind they can be quite thick and may need a lot more pressure in the press. If buds are close to your open flowers they may distort the flower in the press leading to petals shrivelling up, or they will leave an impression or indentation on your flowers. Manipulate the bud so it is away from your open flower or remove it completely and press it separately.
THREE TOP TIPS:
Examine your flower carefully before pressing: consider the shape you want to achieve once it is dry.
Using your fingers to press against the thicker parts of your flower can help to encourage it into a flat shape before placing it inside your press.
Apply plenty of pressure against thicker flowers to ensure even contact against all parts of your flower.
If you’ve enjoyed this blog, you can support my work here - thank you!
Looking to Learn More about Pressing?
Why not explore one of our online courses or flower pressing guides, with detailed information on methods and techniques to press flowers and how to preserve colour and shape.
Join the Little Pressed Flower Instagram Subscription or Mailing List for lots of behind-the-scenes on flower pressing.
Need a Press?
Discover our handmade, unique miniature presses. Perfect for on-the-go pressing, or as a gift for the crafter in your life.
If you’re looking for something larger, we recommend the beautiful Berstuk press. Use the code LPF10BERSTUK for 10% off any of their products.
Learn more about the anatomy of a flower with Britannica.