

5 Crafts with Pressed Flowers
Pressing flowers is often a labour of love in itself, so you want to ensure you prolong their beauty whilst also enjoying them in your craft projects. The possibilities are endless when using pressed flowers for crafts but here are 5 ideas to get started.
Top Tips before crafting:
The key is to ensure your flowers are completely dry before using them in your crafts. Pressed flowers can change to a greenish-brown colour if they’re not crisp-dry before using them, if you apply water-based glues to them, or any heat. They’re also susceptible to mould if you display your flowers in a humid environment. Keep them dry and protected from moisture as best you can.
For more information on pressing flowers, colour correction and resin art, discover our guidebooks and online courses.
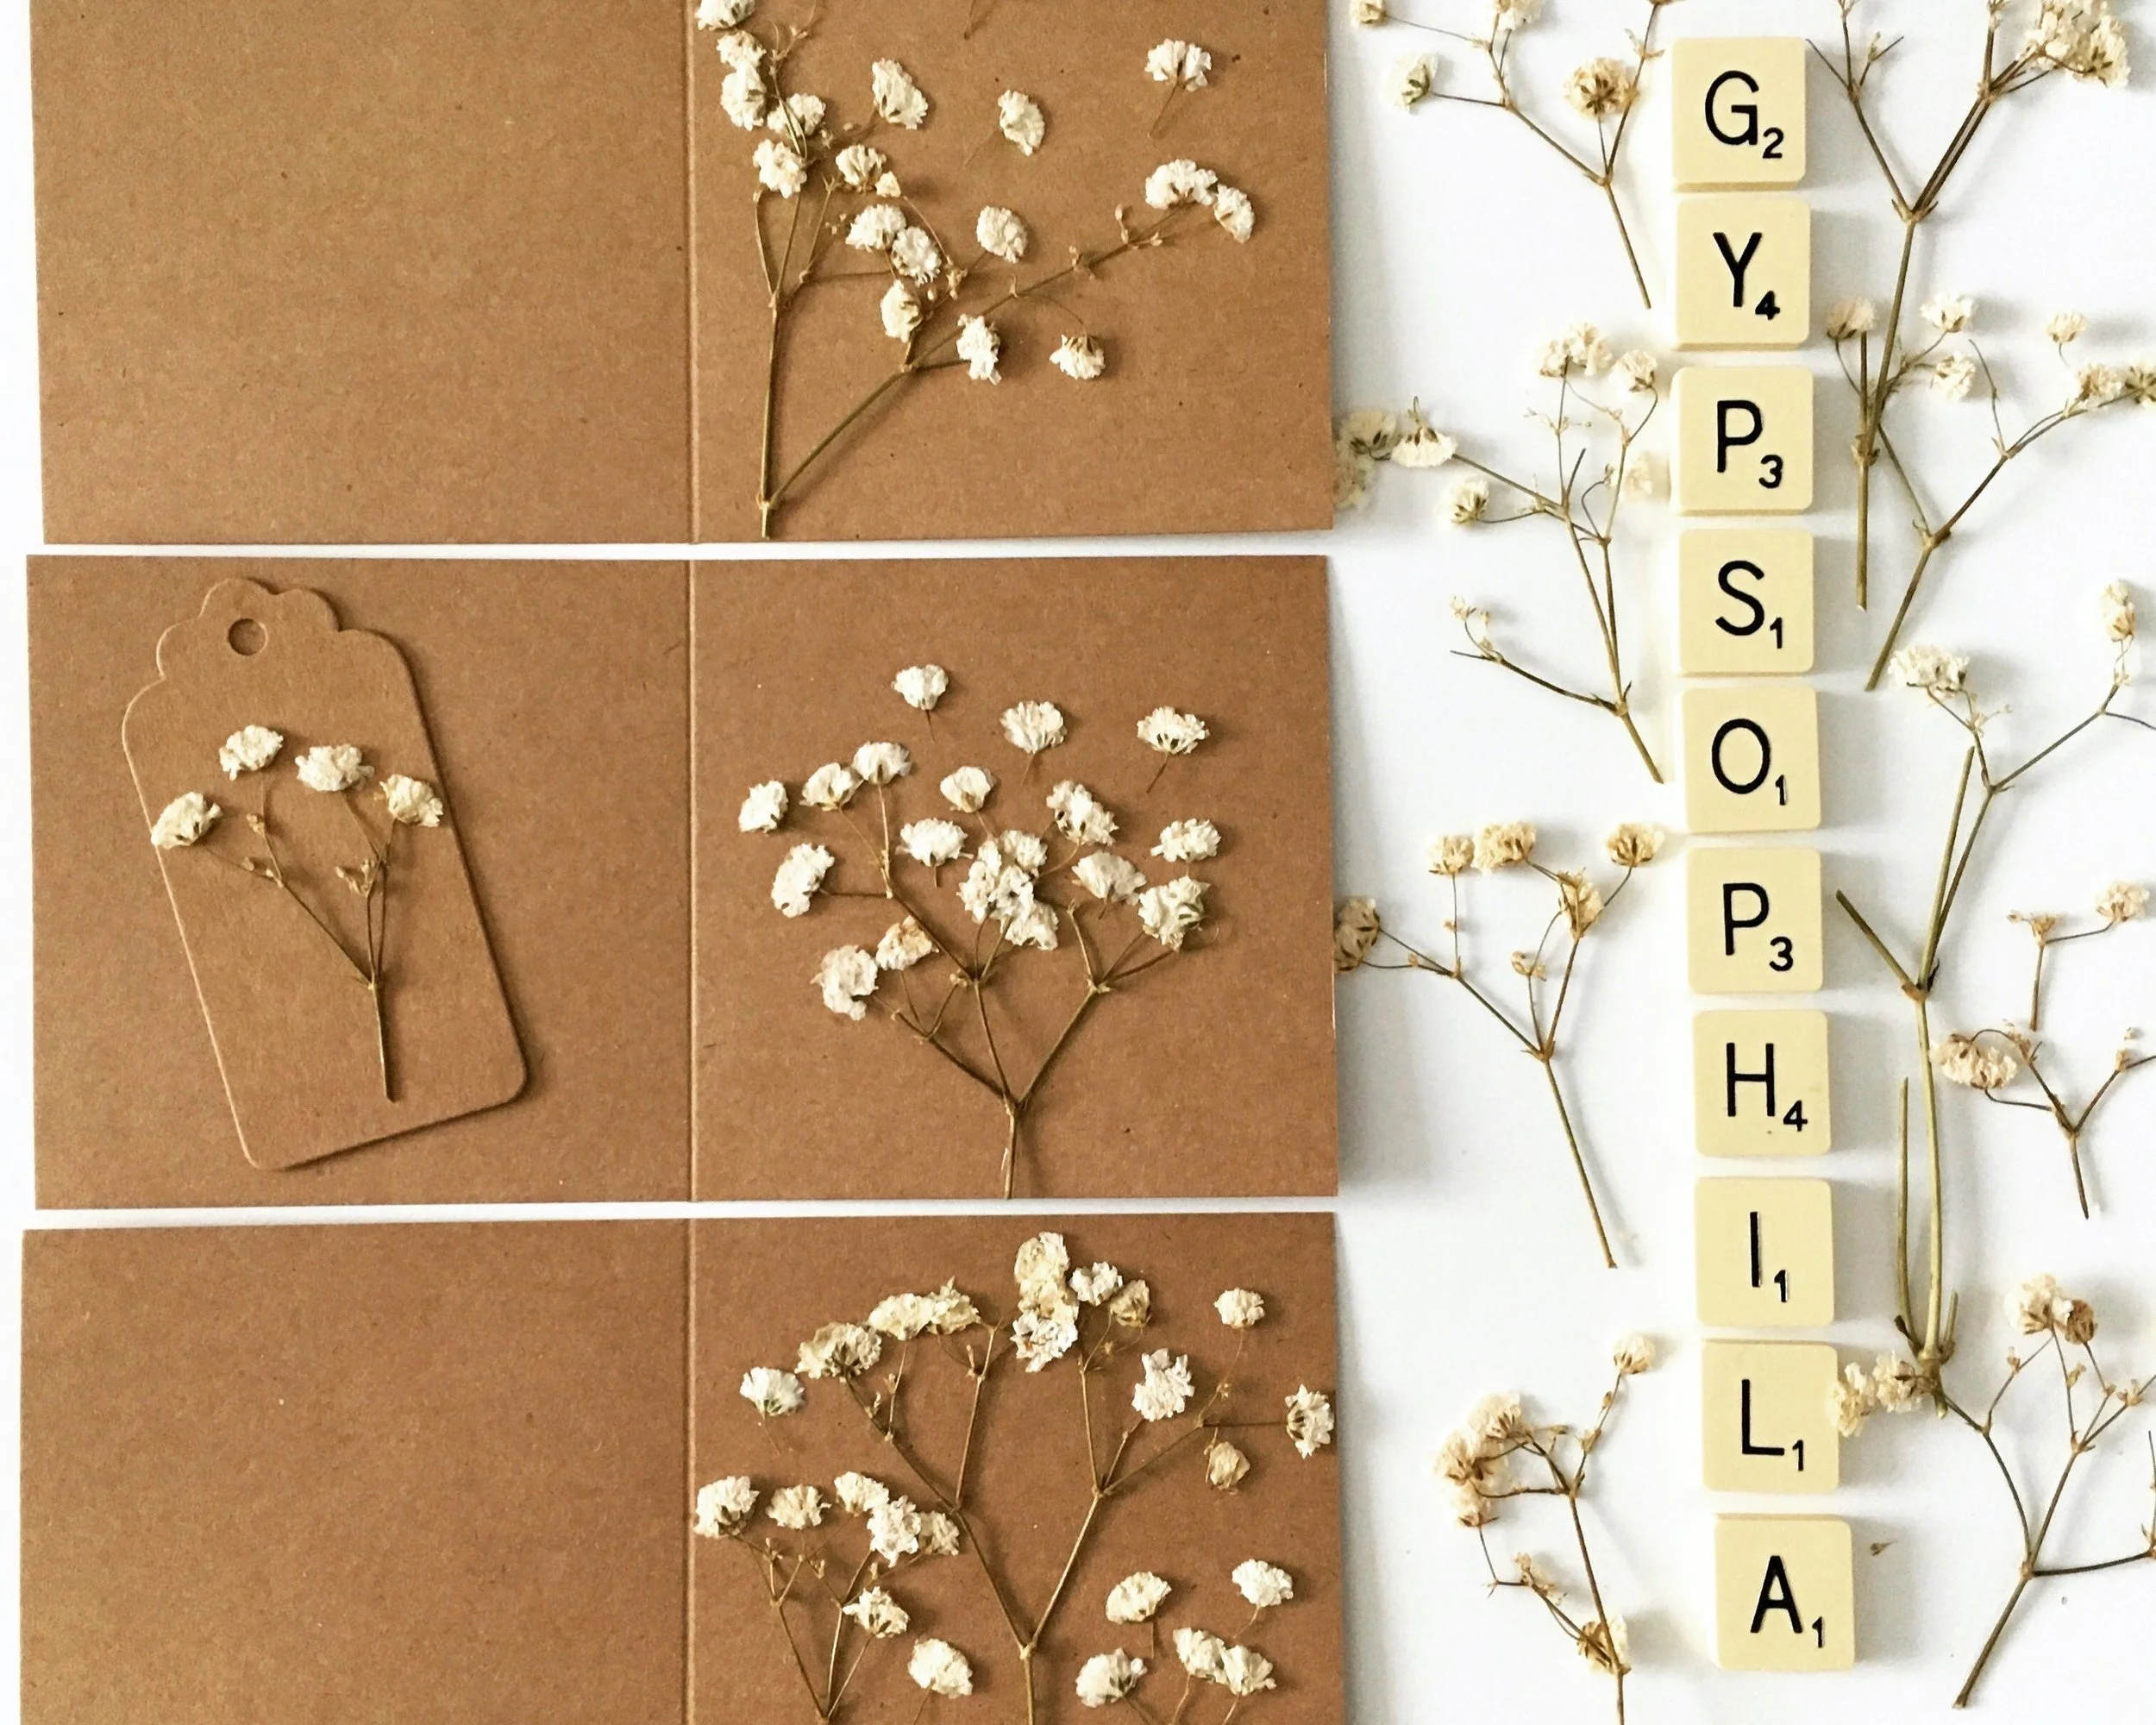
Greetings cards and gift tags made using pressed gypsophila and Kraft card.
Equipment:
Glues
Mod Podge® is a useful crafting glue but it can have a habit of turning your flowers to a greenish-brown colour. PH neutral glues are effective when working with pressed flowers too or UHU® non-solvent all-purpose glue.
A little glue goes a long way! Applying lots of glue can cause flowers to curl or discolour, so begin with light layers or tiny dots. Cocktail sticks are helpful, and quality artist brushes - there’s nothing worse than losing bristles from your brush and setting them into your work!
Sealants
Once you have glued your flowers to your project and the glue has set, you may want to consider an extra layer of sealant to varnish and protect your work.
NOTE: sealants do not protect your flowers from fading or changing over time, even UV-resistant sealants will not completely prevent deterioration. All flowers eventually fade or change over time. It’s part of the beauty of working with something organic and transient. Plus, sealants can cause flowers to go blotchy or curl, so use them sparingly.
Mod Podge® often acts as a good sealant, but can leave a tacky finish, even when completely dry. I like to use Vallejo® Polyurethane Gloss Varnish to finish projects. Other brands are available, and you can choose matte or gloss, depending on what finish you would like. Sealants are also available in sprays and some are UV-resistant.
It’s worth adding that varnish is great if you’re making coasters too. Heat can however, be an issue for pressed flowers, causing them to discolour, so use caution.
If you’re using air-dry clay or polymer clay, you may want to consider using a clay varnish specifically designed for the material, but I’ve used the Vallejo® brand for clay and it has worked just fine.
5 crafts to try with your pressed flowers:
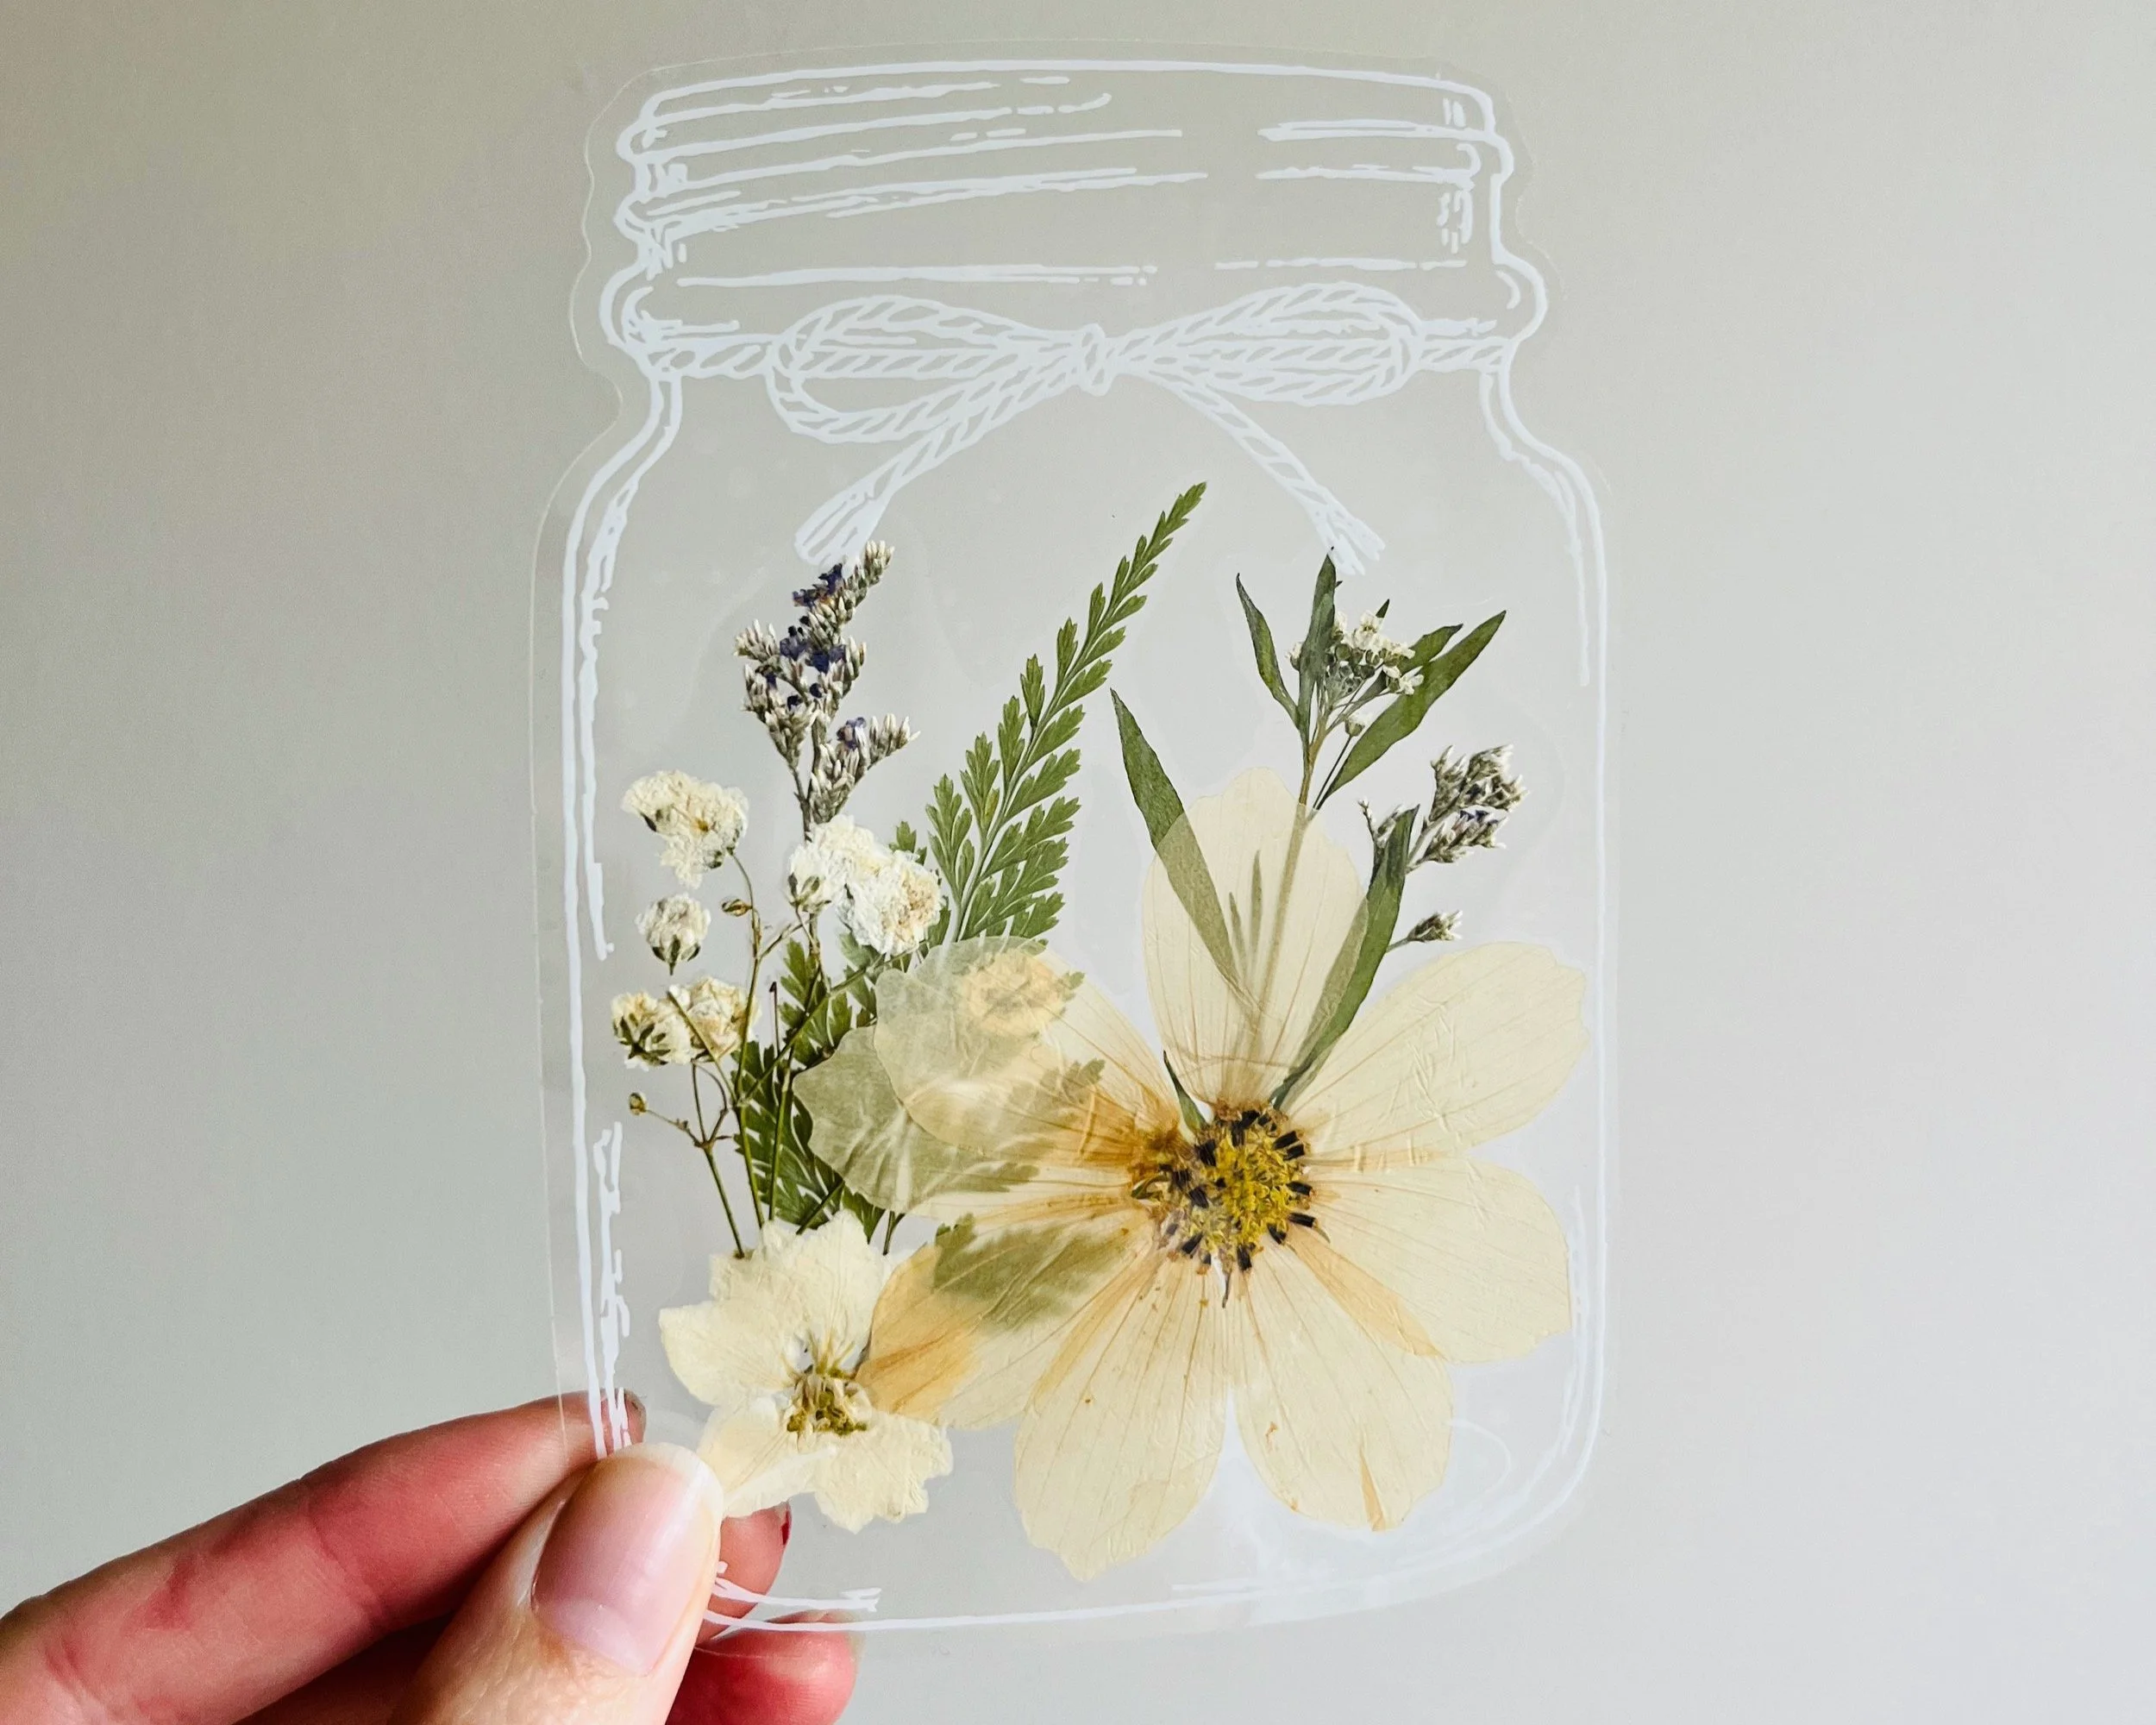
1. Paper crafts: cards and gift tags
Paper crafts can be enjoyed by all ages to create simple but effective handmade gifts. A little glue goes a long way when applying your flowers though, so try using a cocktail stick to apply it to the most robust parts of your flowers such as centres or sepals, stems and leaves.
Flowers can be applied to cards and gift tags to give a personalised touch.
You can leave your flowers exposed or seal them using glue or transparent contact paper. Personally, I do not seal mine so you get the textural effect of the flowers. But be careful when placing it inside the envelope so as not to tug or tear delicate petals.
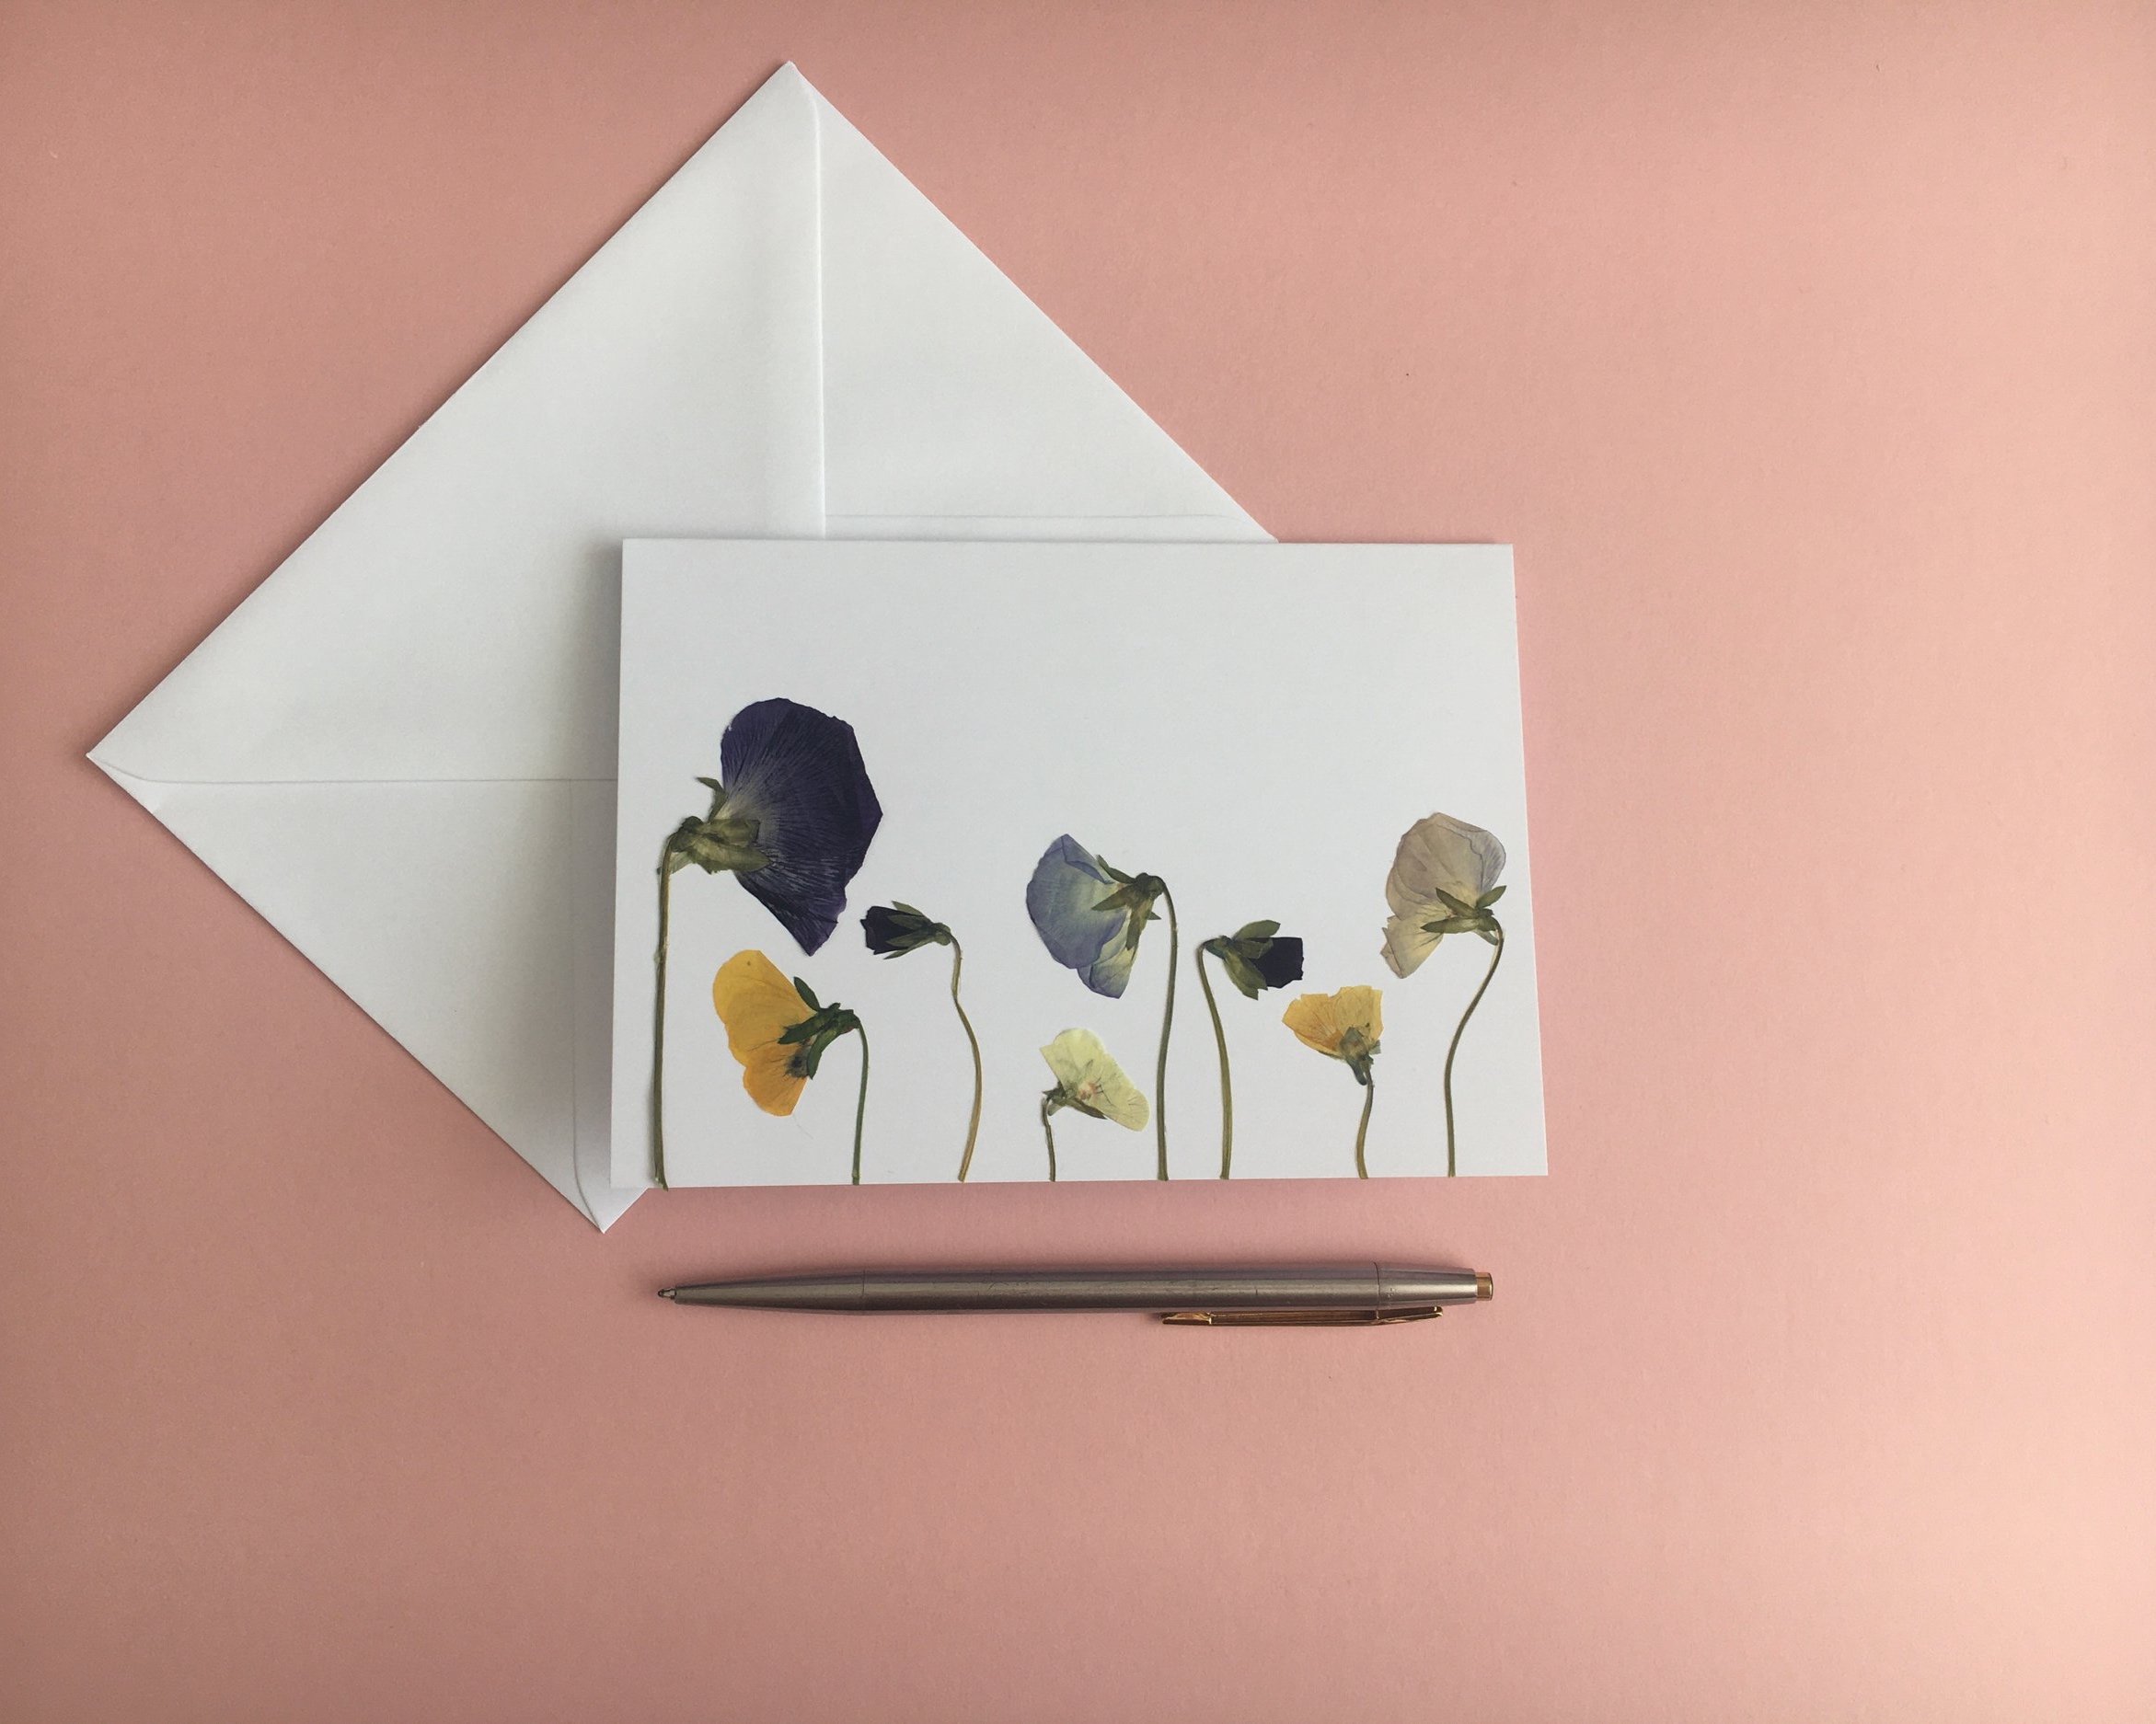
Greetings card made using 5"x7" 250gsm card and pressed viola flowers.
2. Lanterns, tea-light holders and vases
Keeping a pretty jar, but not quite sure what to do with it yet? Recycled jars can make the prettiest tea-light holders, lanterns or vases.
Making them is simple:
If your flowers are quite brittle, they’ll break as you apply them (depending on the shape of your container, of course) so choose flowers that will flex around the shape of your container.
If you’d like your container to be an opaque colour (if you’re using it as a vase, for example) try painting it with a couple of layers of acrylic paint and allow it to completely dry before applying your pressed flowers.
Apply a thin layer of glue to the surface of your container. Position your flower onto your container and seal it with another layer of glue.
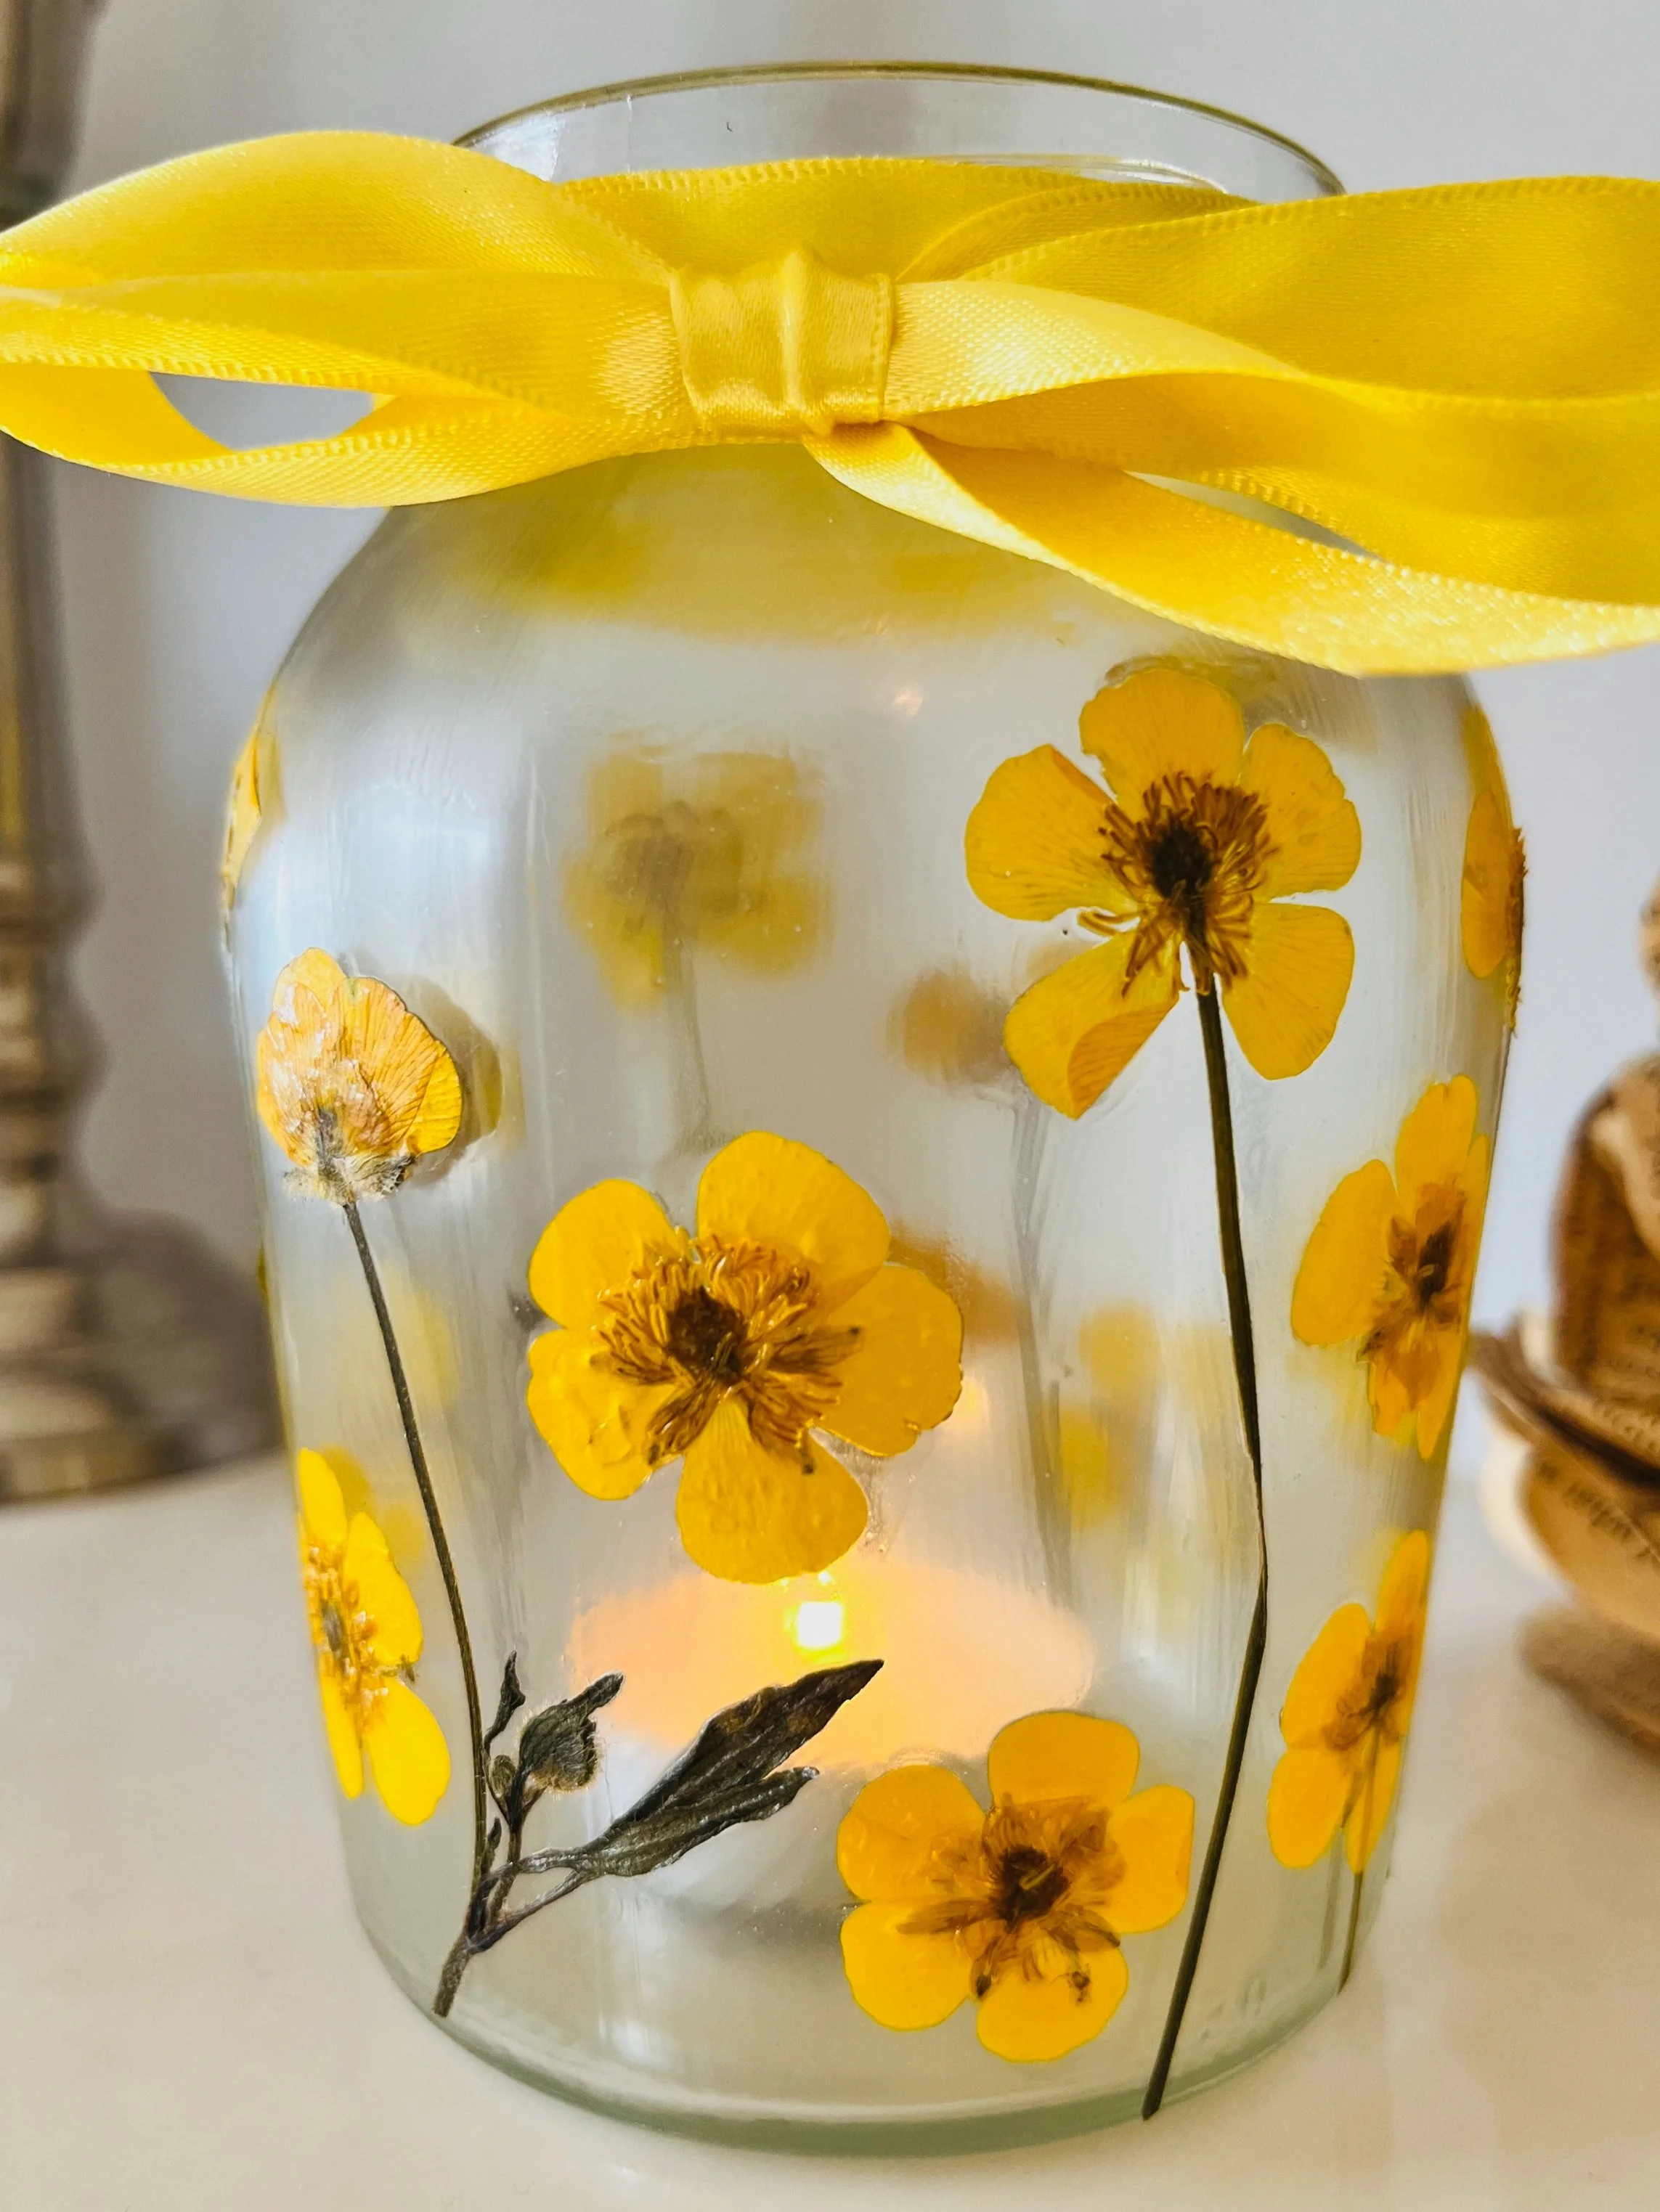
Tea-light holder made using a recycled jar, pressed buttercups and Mod Podge®.
3. Ceramics and clay
Blank ceramics are available for a wealth of projects in all sorts of shapes and sizes. You can create vases, hanging ornaments, dishes or coasters on ceramic surfaces. Choose unglazed ceramics and apply your pressed flowers using a little glue. You can then use your glue, sealant and/or varnish to paint a thin, glossy layer over your design to finish.
Alternatively, you can create your own clay creations using air-dry clay. Air-dry clay can take a few days to completely dry out and may need rotating as it dries (follow the manufacturer’s instructions carefully). Allow the clay to be completely dry before applying your pressed flowers.
Some projects to try with air-dry clay:
Try making decorations using a cookie cutter to create your desired shapes. I use a straw to poke out a hole to hang the decoration from.
Cut out shapes and place them in a bowl lined with clingfilm to shape trinket dishes.
You could even try creating seasonal pieces, such as moulding your own pumpkin or a ghost.
Once your air-dry clay is fully hardened, apply your pressed flowers using glue and seal them using varnish for a glossy finish. You can also purchase specific glues and sealants for air-dry clay which will prevent discolouration due to the porous nature of the clay.
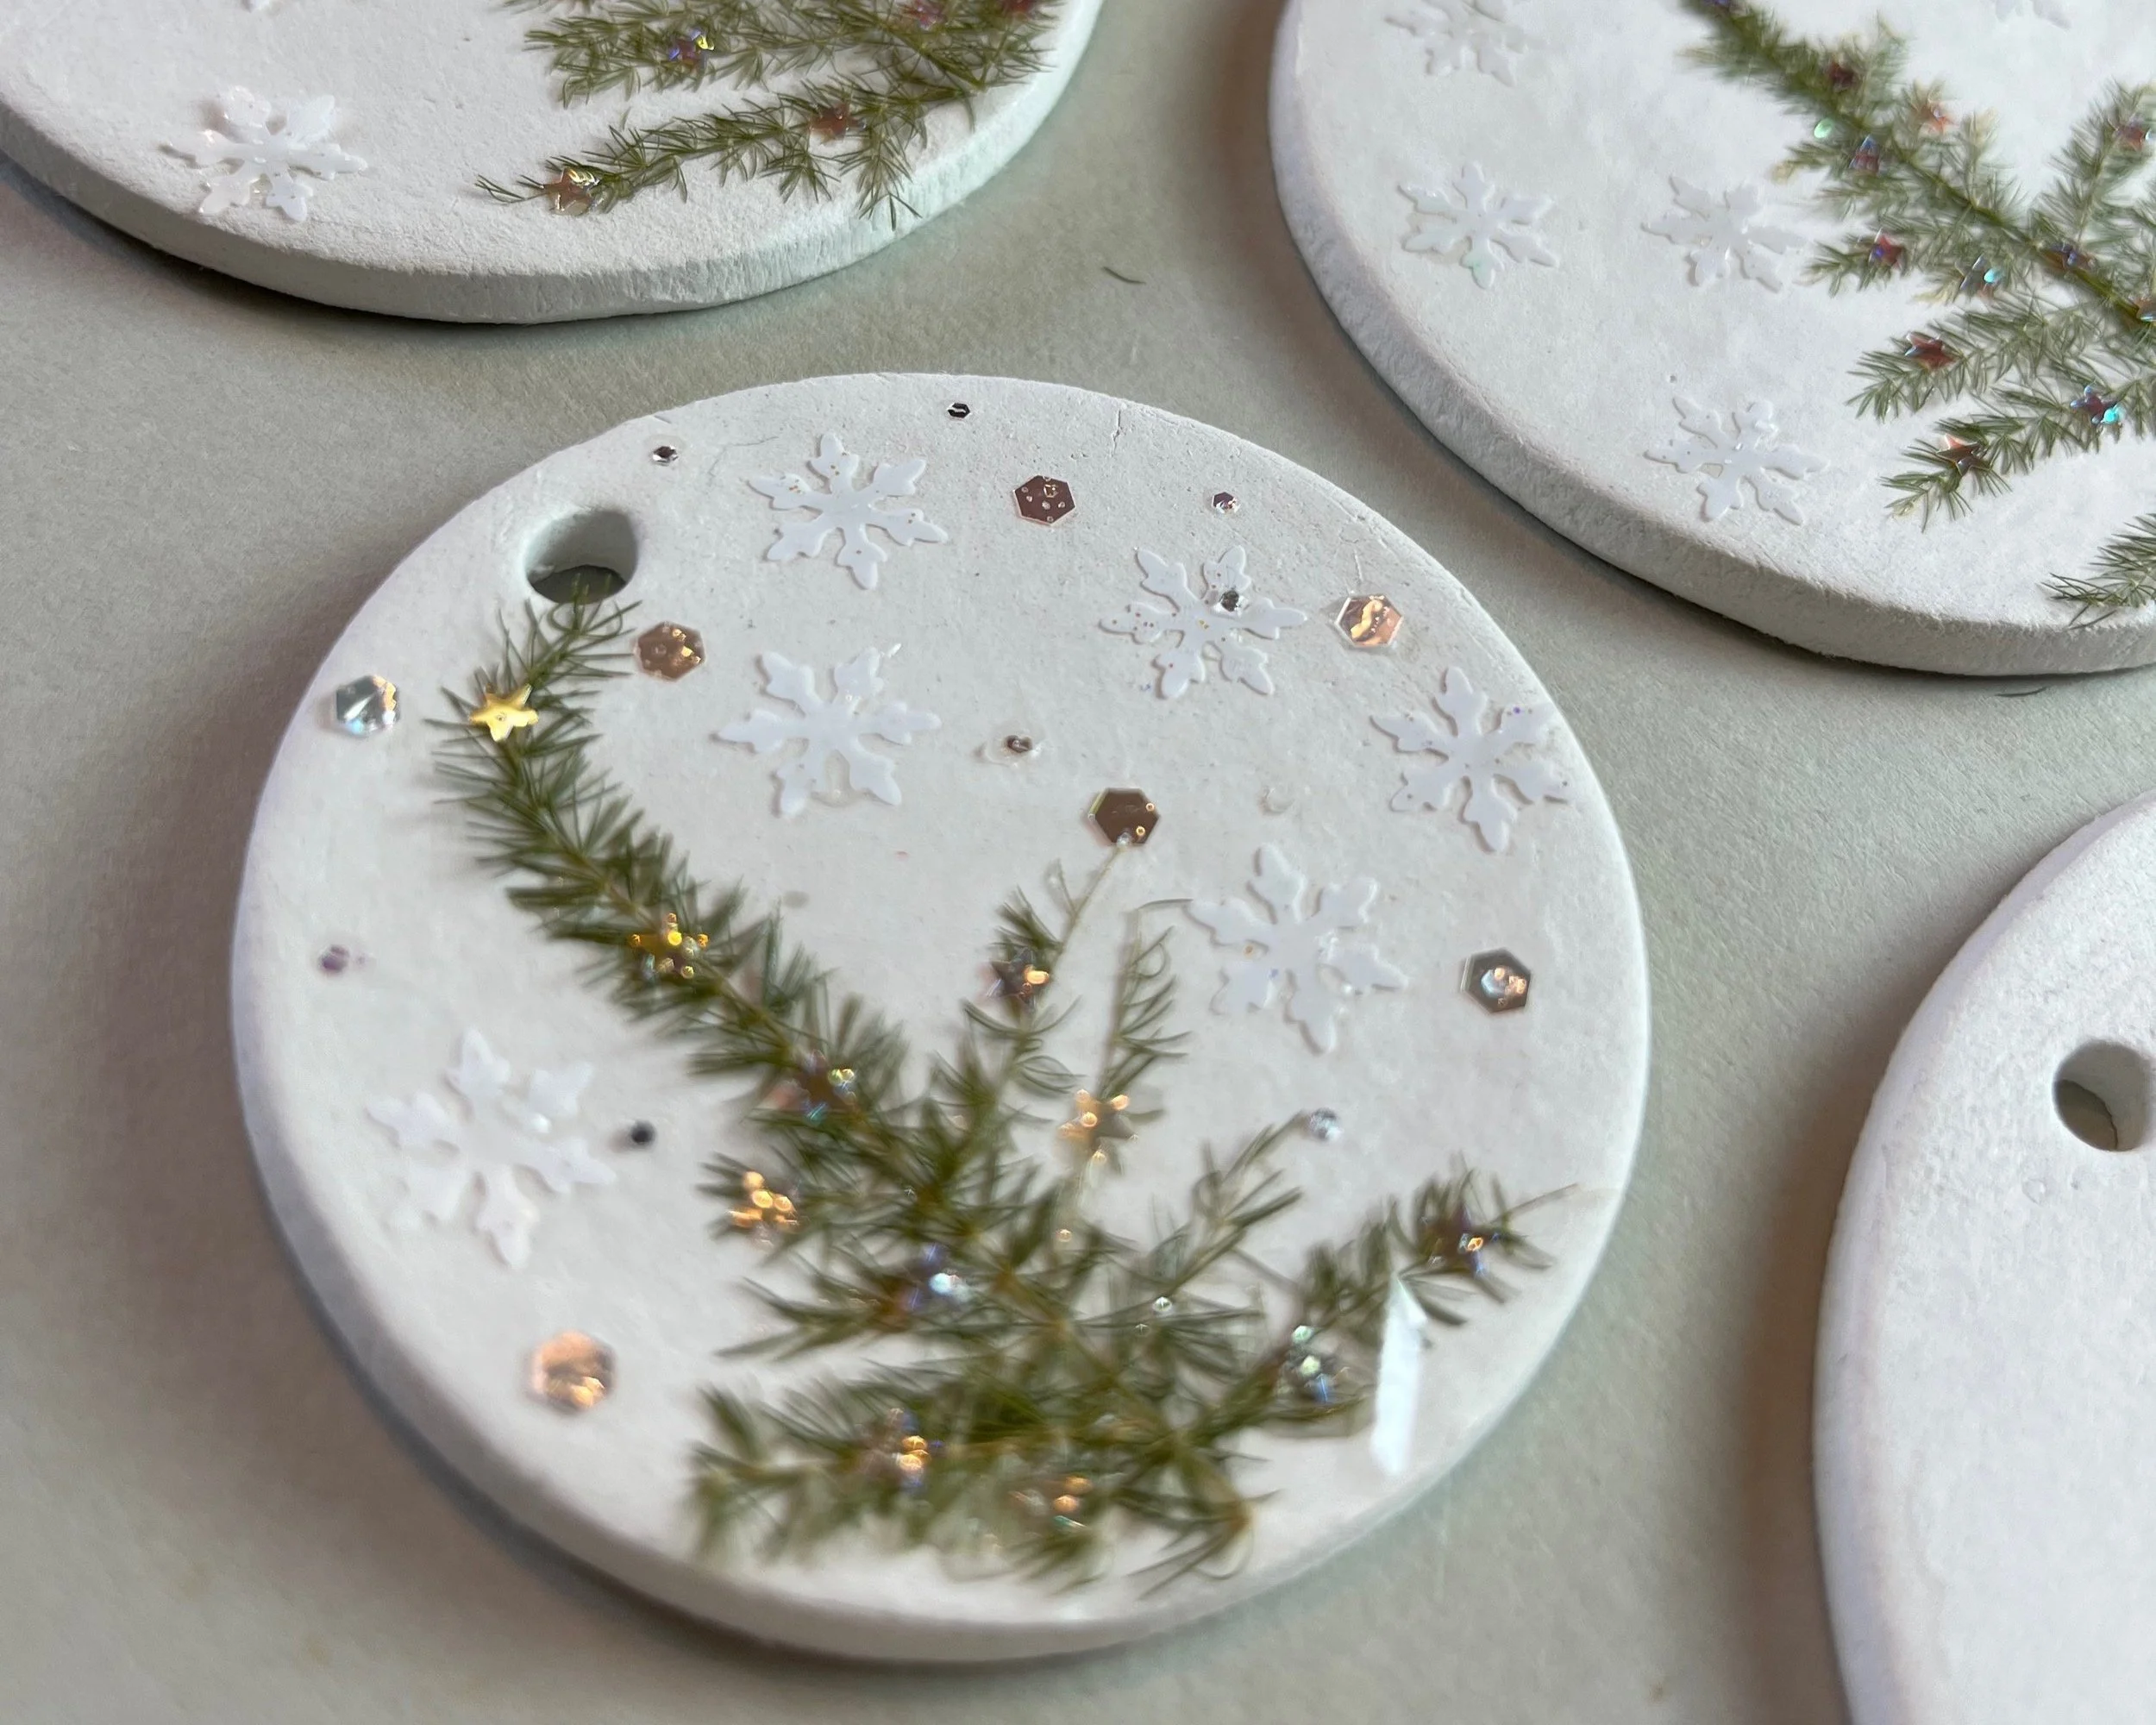
Air-dry clay decorations, with pressed foliage and glitter.
4. Frames
Framing preserved flowers has become a popular craft, particularly for sentimental preserved flowers such as weddings or funerals. There’s an abundance of information out there and artists you can follow for inspiration on social media who preserve flowers in frames. If you’re looking to frame flowers professionally, please seek expert advice. The Flower Press Studio has a tutorial on professional framing which is helpful for beginners.
You can purchase double-sided glass or acrylic frames from craft stores, homeware departments and online. Hanging metal frames, such as floating frames, have become very popular, but you can use wooden frames or even box frames for your project.
It’s worth remembering that UV-resistant glass or acrylic can help to slow the fading and changing of your flowers (it doesn’t stop it completely, unfortunately!). However, you’ll pay more for this type of frame.
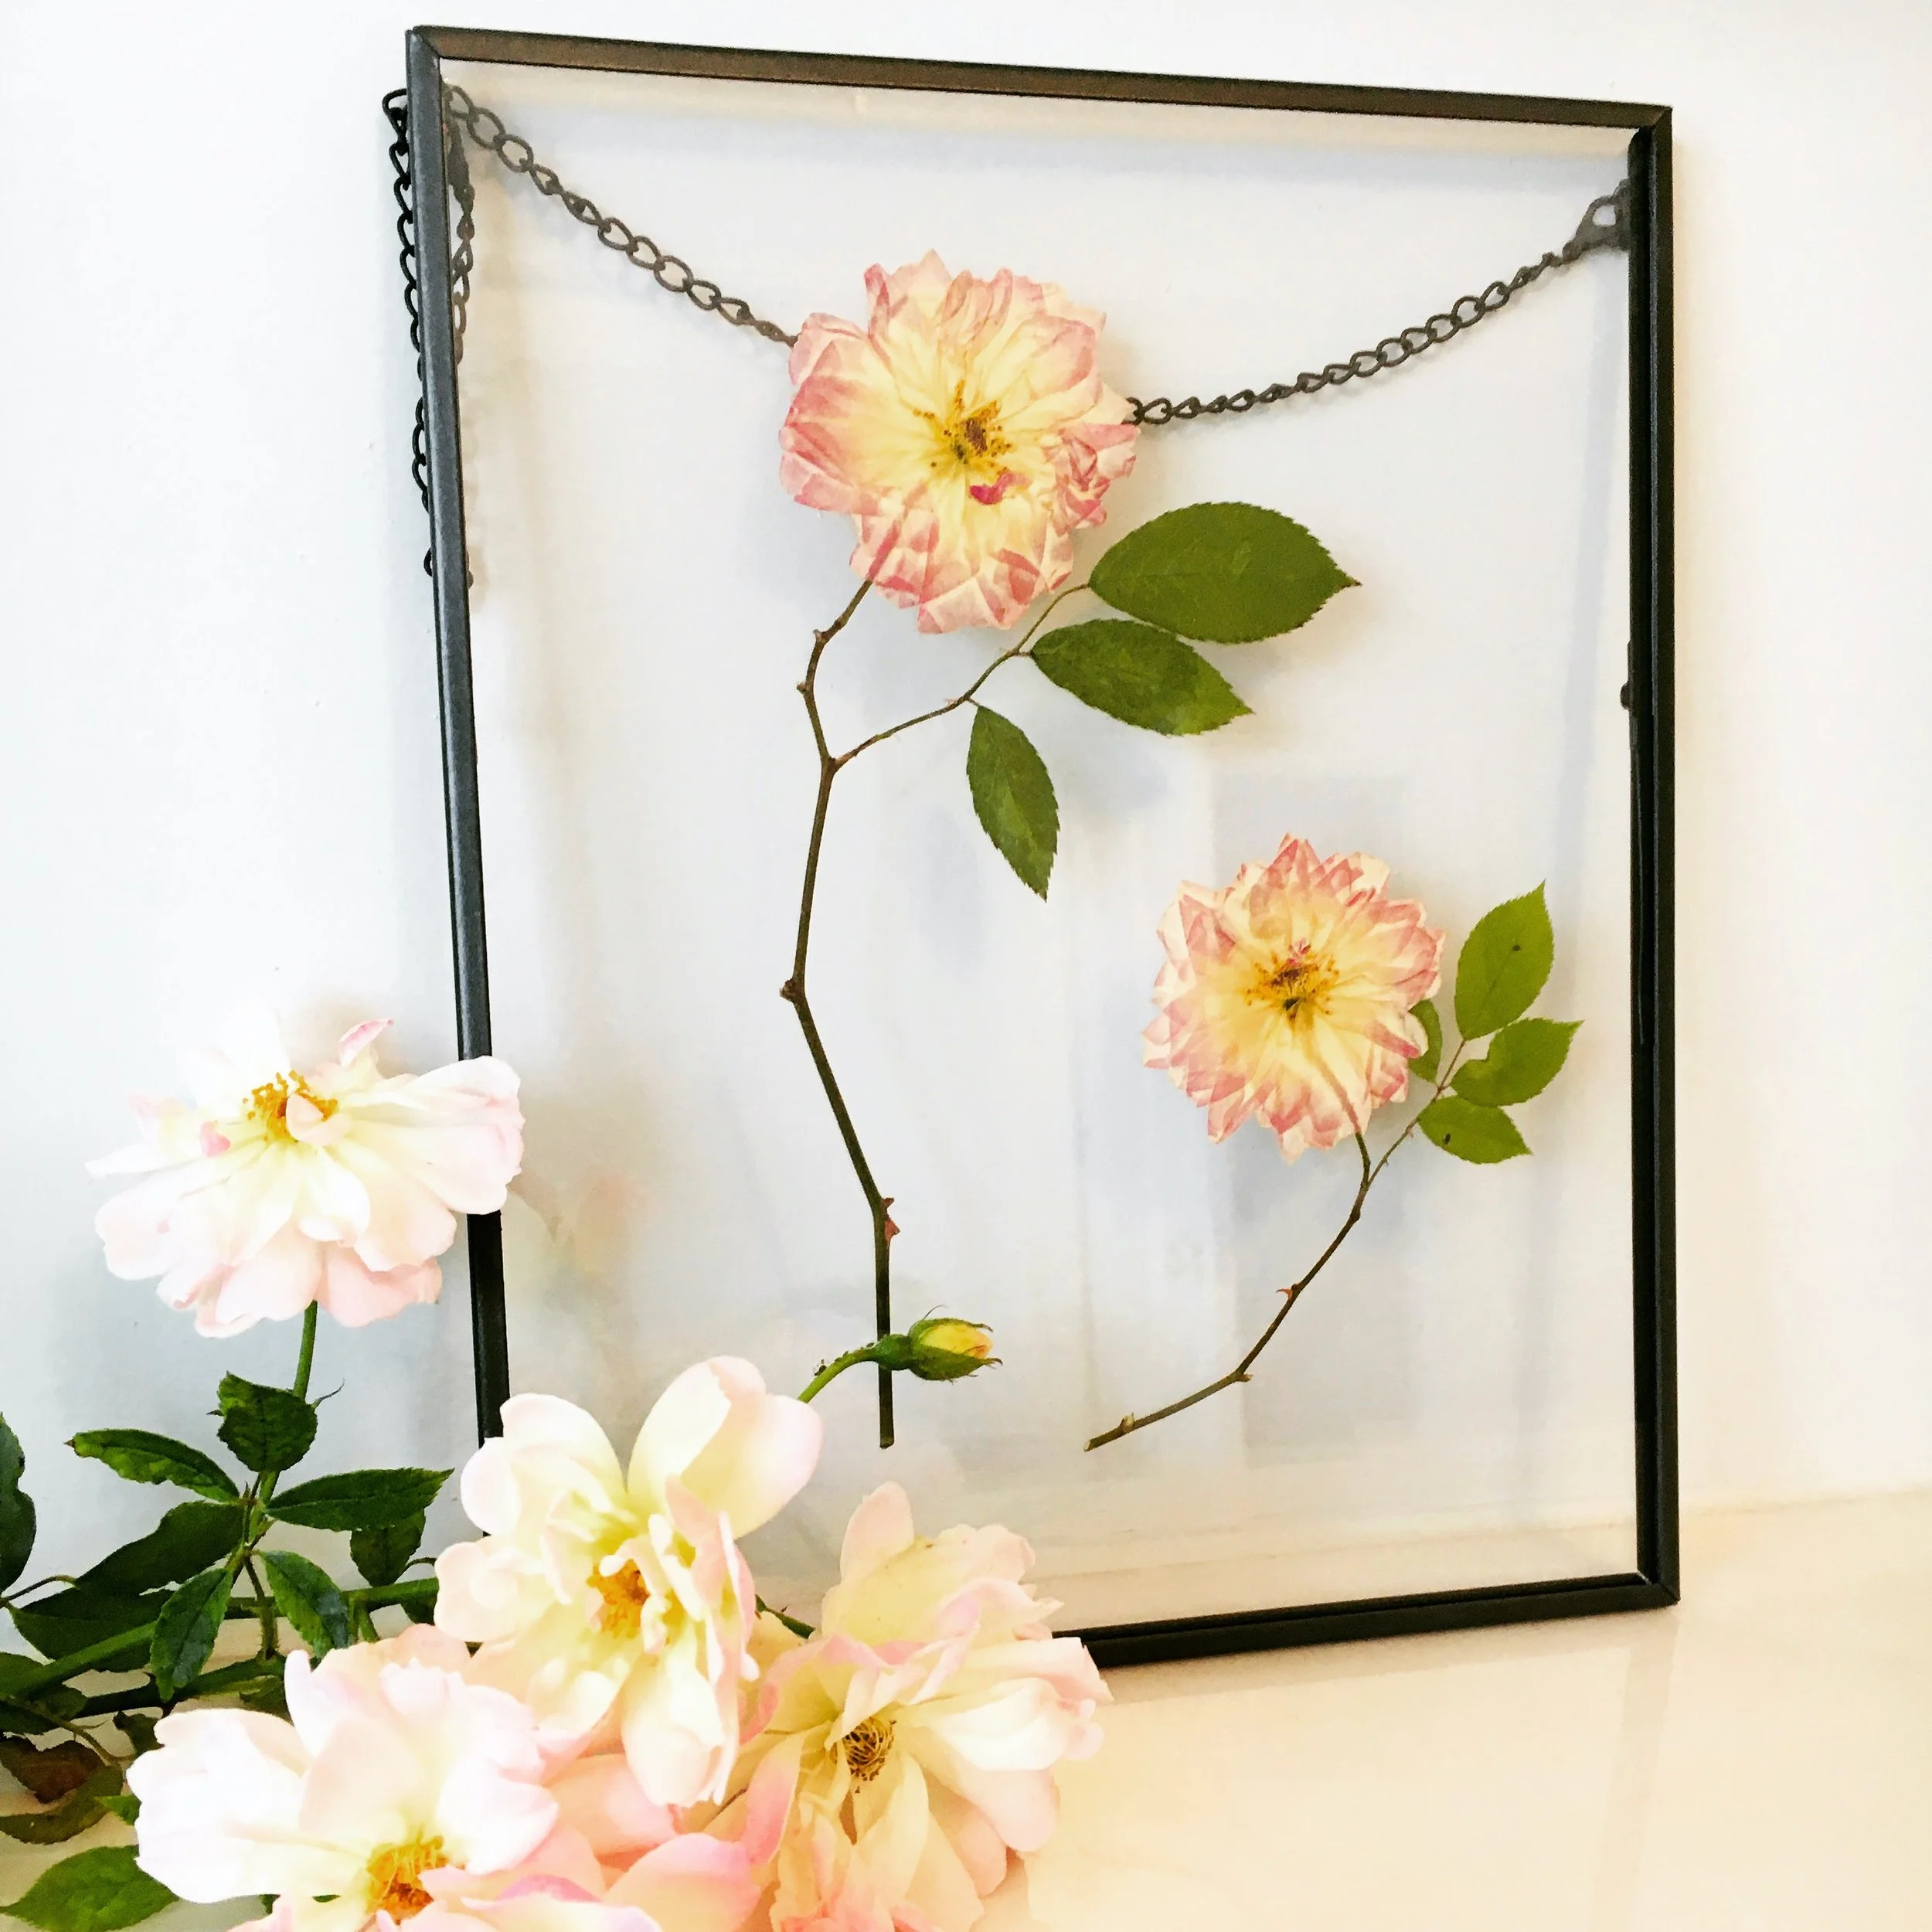
Floating frame with pressed rambling roses.
You may want to work on a design on a piece of paper or directly on the frame itself before gluing. This will help you to decide on a composition and which flowers work best in your frame. Thicker flowers or those with raised centres, stems or sepals may push against your pieces of glass (if you’re using a floating frame, for example) and it can become difficult to close the frame. Ensure you choose flowers that fit your frame and they’re pressed as flat as possible.
Whether you are using a floating frame or a backed/mounted frame, when gluing your flowers try to use minimum amounts of glue applied to the most robust part of your flowers such as centres or sepals, leaves and stems; just enough to hold them in place. Use a cocktail stick or thin artist’s paintbrush to apply the glue. If you apply too much glue to thin petals, it can easily show through your work and can discolour your flowers. You don’t want your glue on show. Sometimes the positioning of your flowers in your design can help to hold flowers in place, or if parts of a flower are not on show you can apply glue to those parts for added stability.
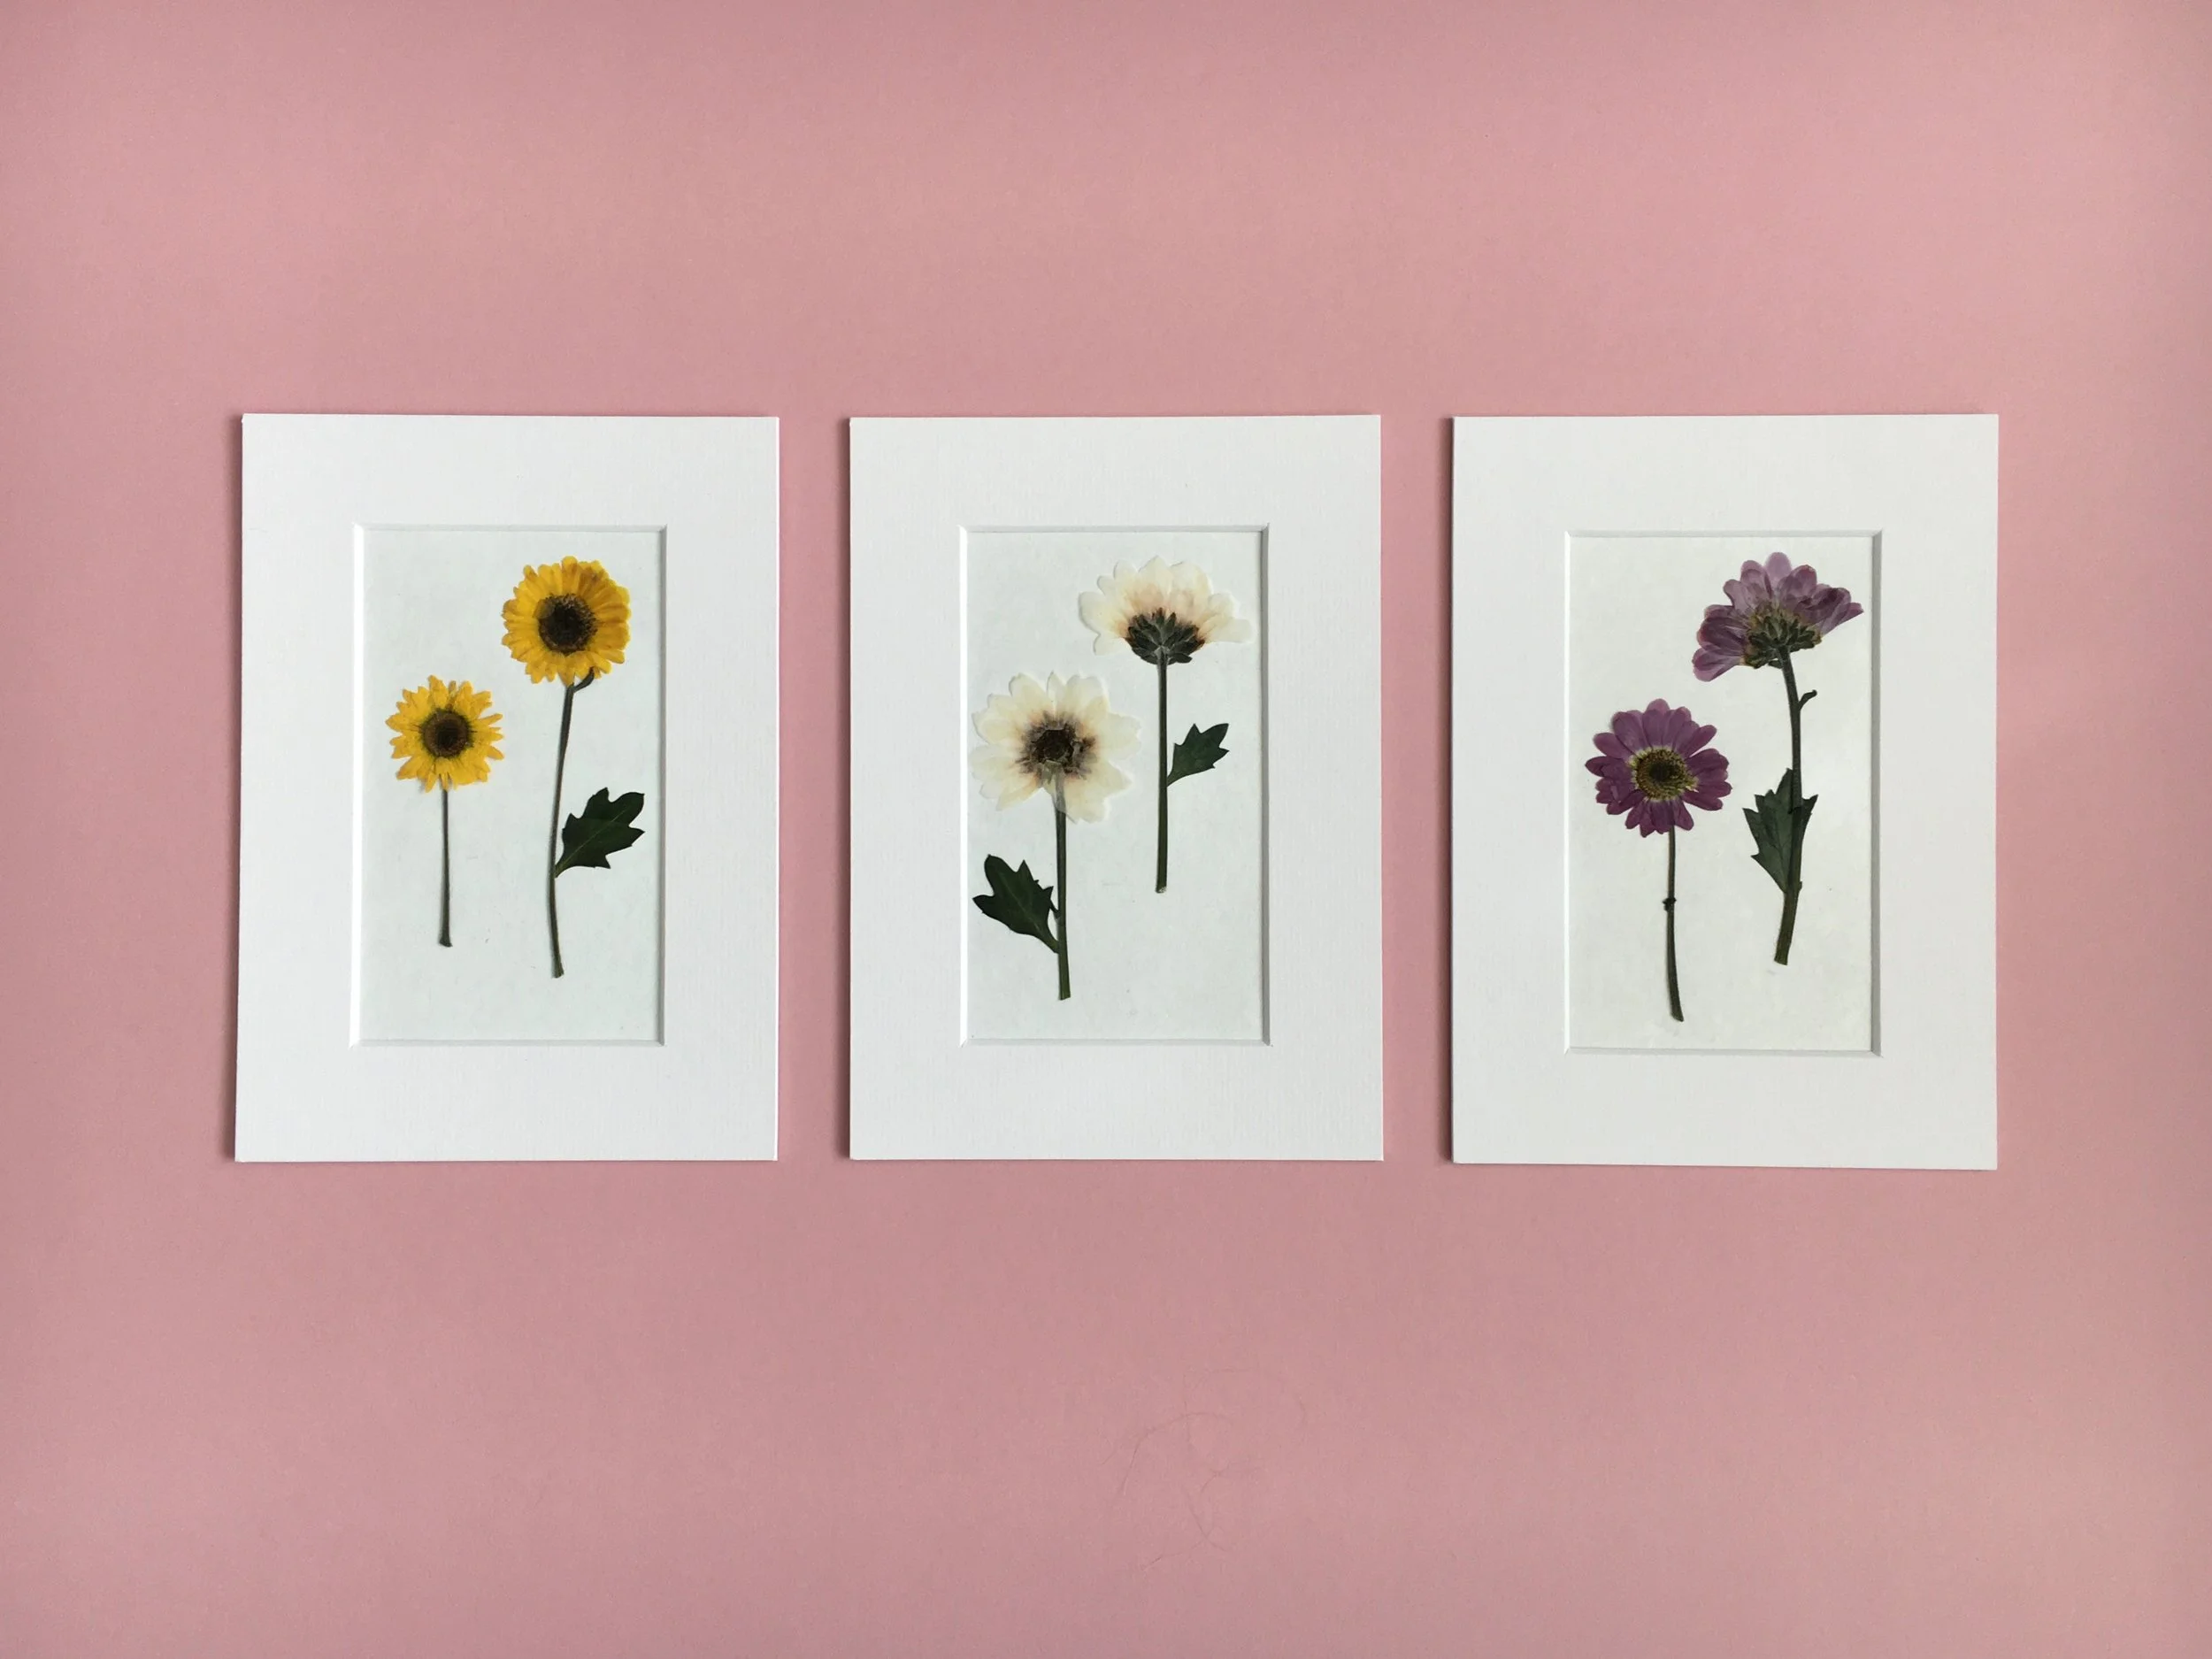
Pressed chrysanthemums on recycled cotton paper and mounted before being framed.
Examine your design carefully, use tweezers to help position the flowers and apply glue in very small amounts.
Furthermore, the key to frames is to protect your flowers from humidity, as well as sunlight. If you can, I always recommend sealing your frames. Try to use copper foil tape, or archival/conservation framing tape where possible as this is more likely to protect your flowers. Sealing, however, is one downside of floating frames, because the gap around the edge leaves your flowers exposed and unless you solder it shut yourself, you can’t seal in your flowers. Therefore it’s imperative you hang these frames away from sunlight and humidity.
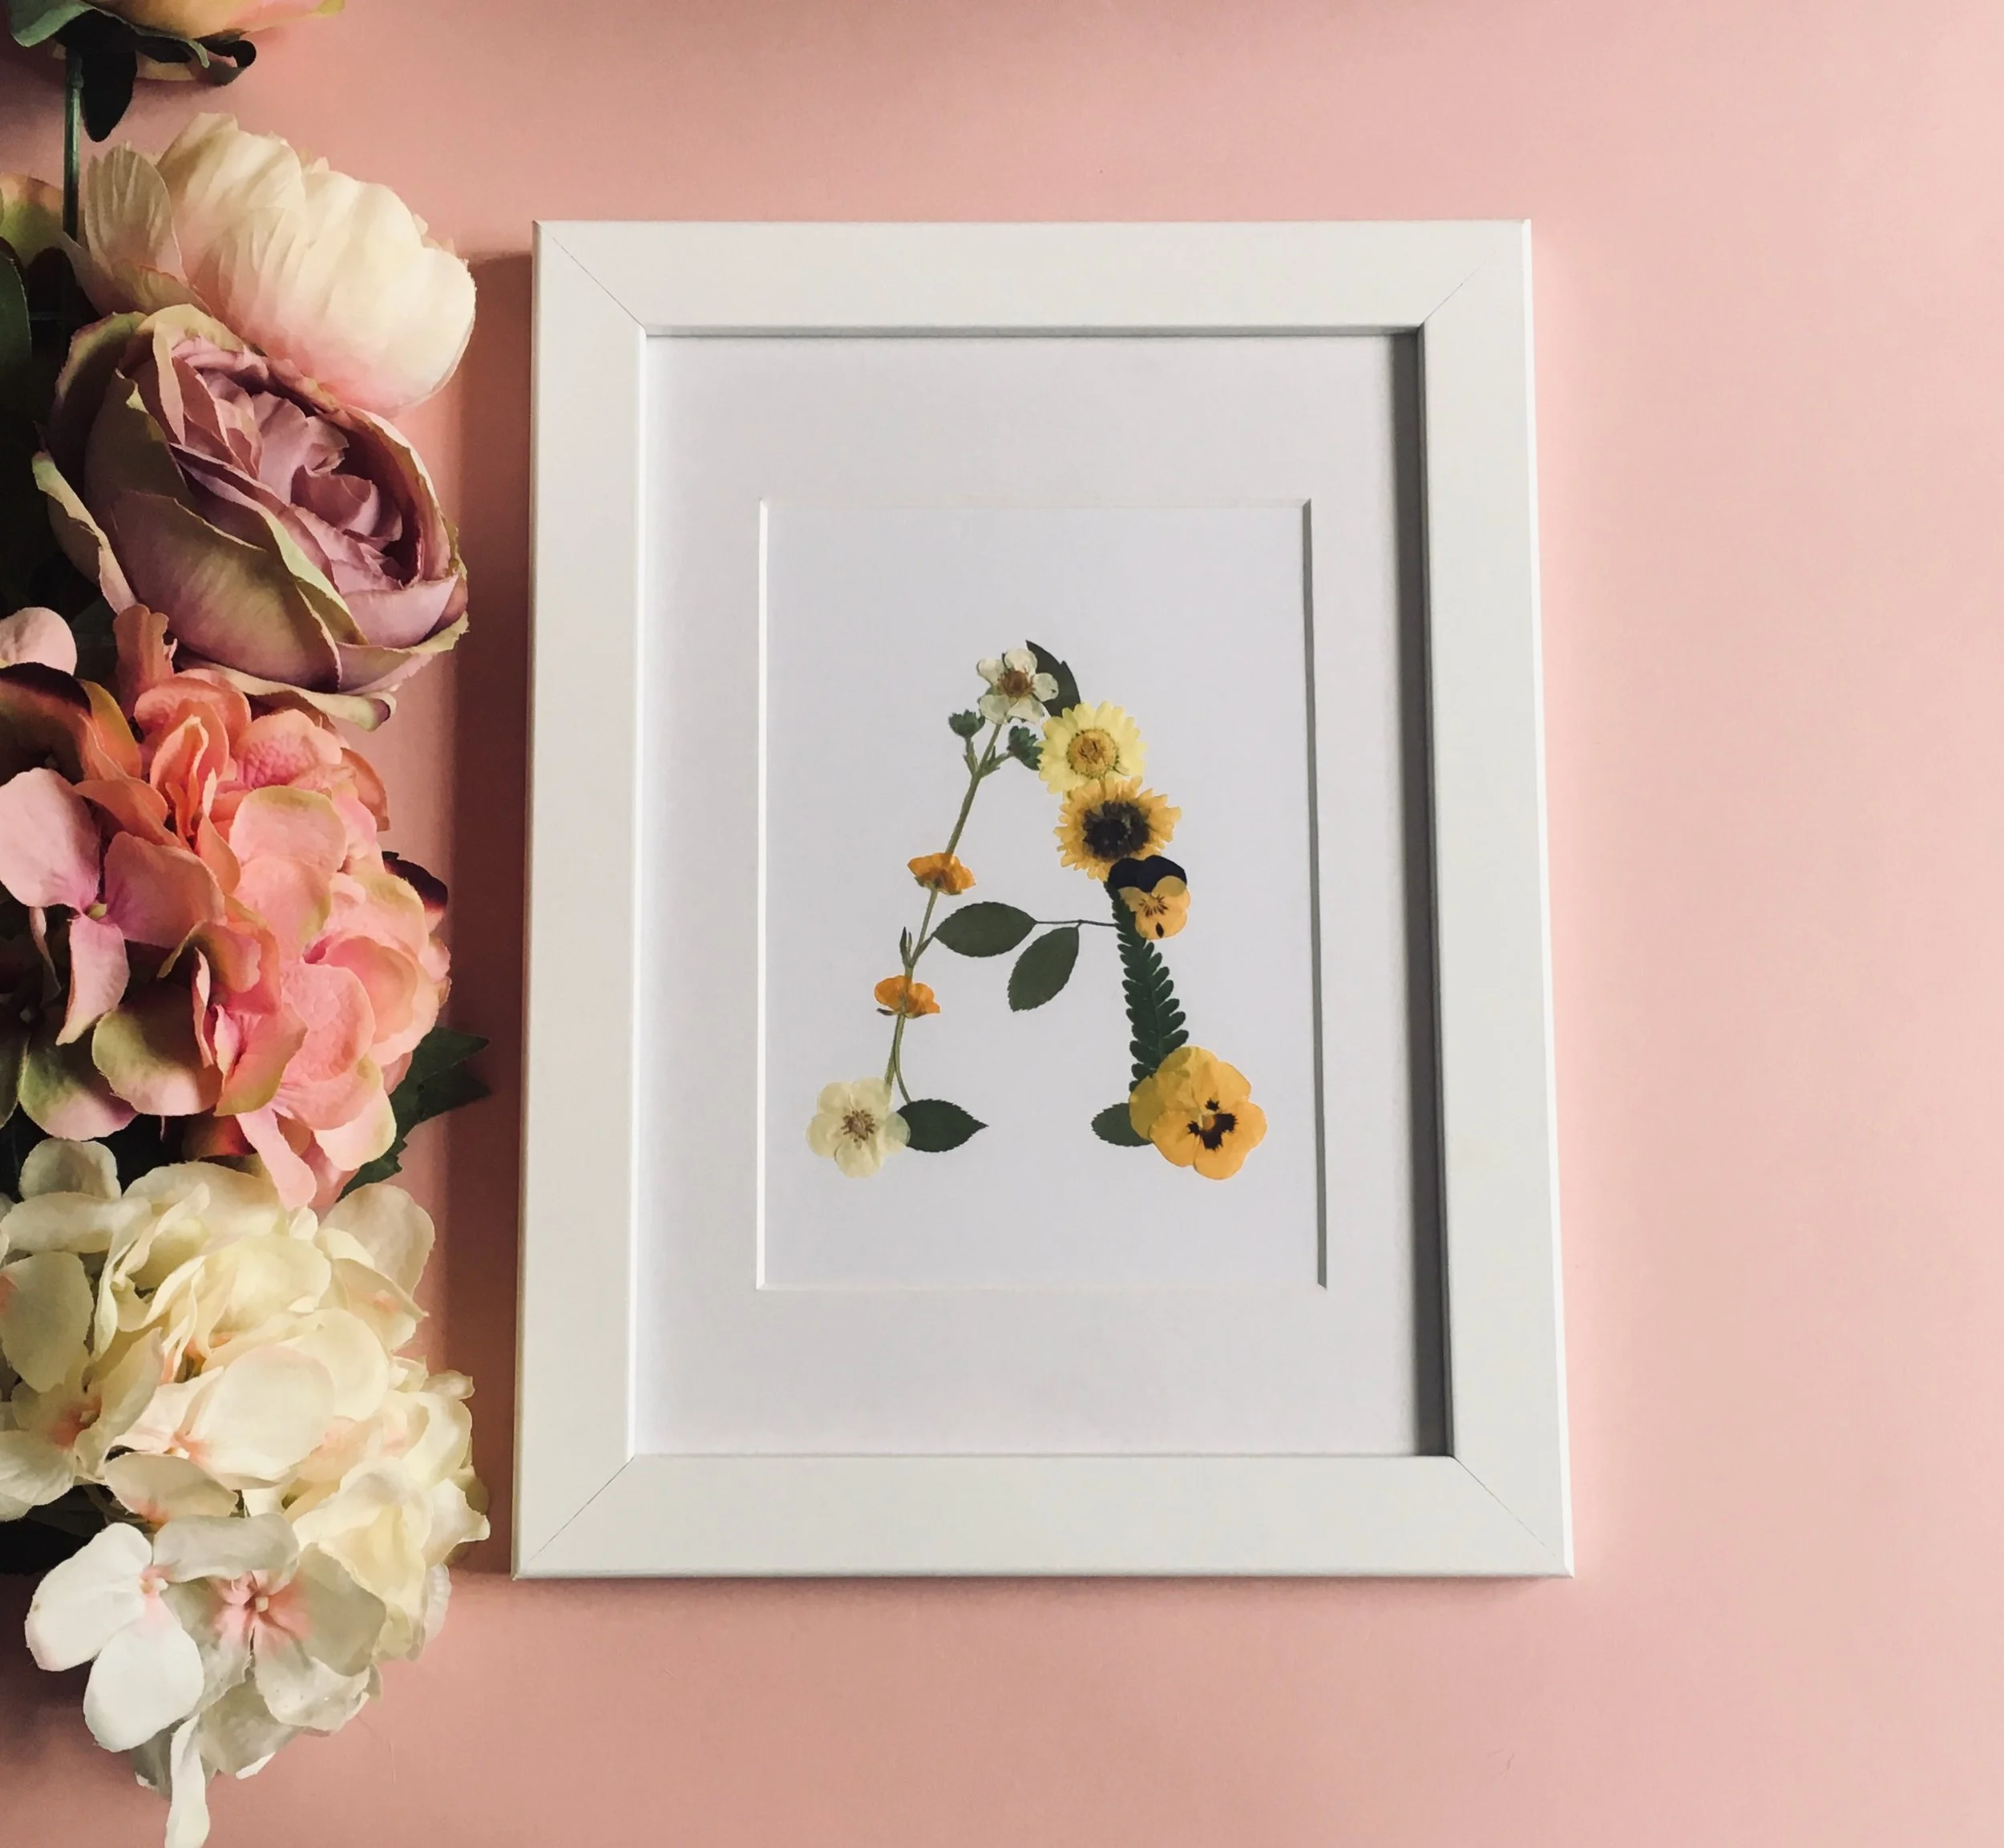
Mounted and framed floral initial 'A'.
5. Bookmarks
Bookmarks are a simple, easy way to enjoy your pressed flowers, and they make a lovely gift. PLUS, the book protects the flowers from sunlight and therefore prolongs their colour. It’s a win-win!
Cut out your bookmark shape using a guillotine for precision. You can round off the edges using a round corner cutter. Try using recycled cotton paper or handmade paper for a more rustic look. Colourful paper is great for crafting with children.
Apply your flowers to your paper using a small amount of glue at the most robust parts of the flower (their centres, sepals, stems or leaves).
You can seal them using glue, or transparent contact paper. Be cautious if you use a laminating machine to seal your bookmark, as they can get quite hot and heat can discolour some types of flowers. If you’ve laminated them either using contact paper or a lamination machine, you can also round off the corners to make them less sharp. Try using a felt-edge squeegee to press out bubbles and ensure contact between your flowers and the contact paper/lamination sheet.
Alternatively, transparent bookmark blanks and kits can be purchased online or from craft stores. They come pre-cut and kits often include tassels too. Why not try filling bottle-shaped designs for a unique, pretty gift.
Cut out a small hole at the top of your bookmark (you can purchase punch cutters for this too) and add a tassel, ribbon or embellishment.
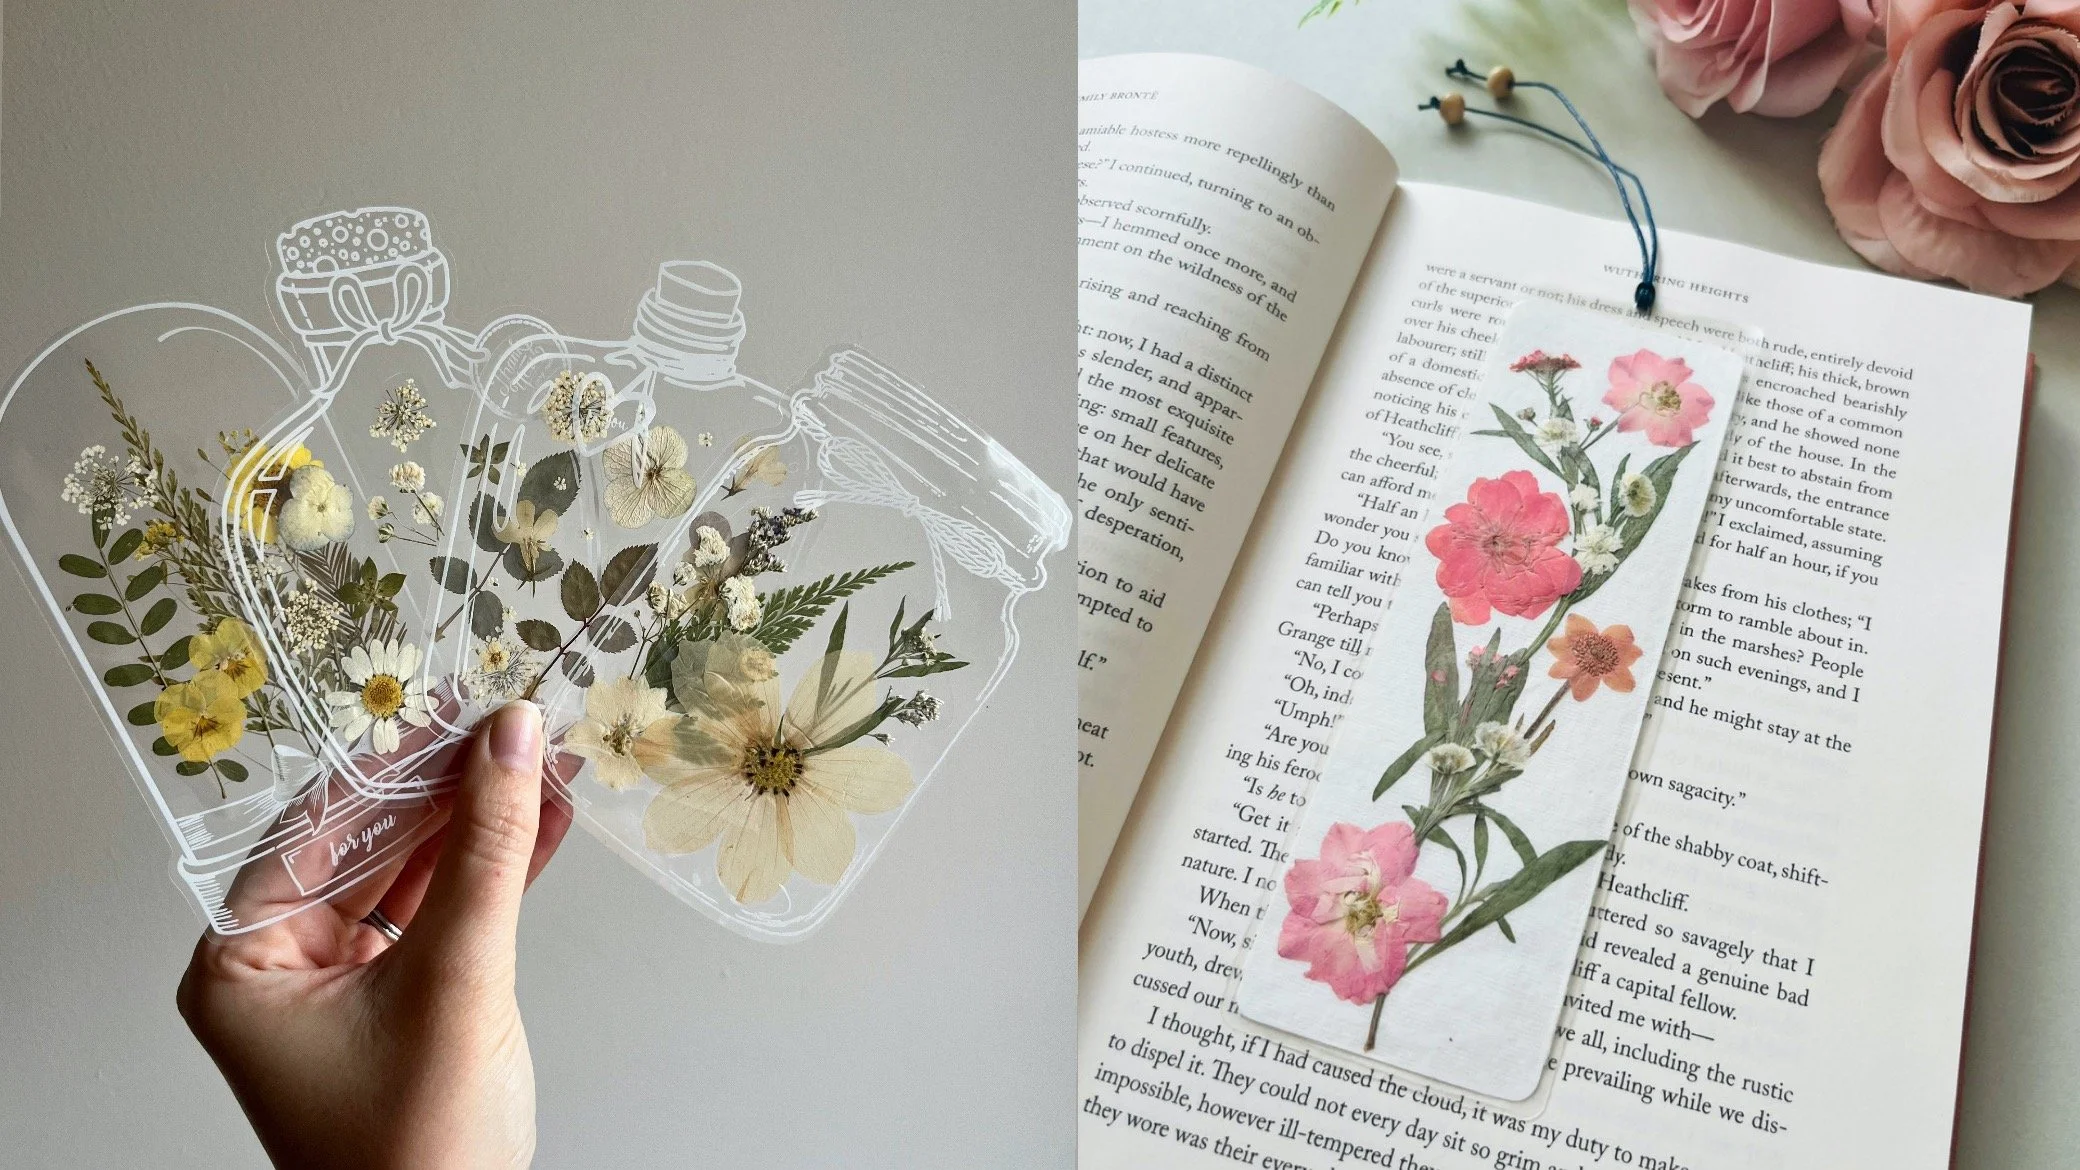
Pressed flower bookmarks.
If you’ve enjoyed this blog, you can support my work here - thank you!
Create, Preserve and Enjoy
There are a multitude of ways to extend the joy of your pressed flowers, particularly if you’re looking to create handmade or personalised gifts.
When I first started pressing over 14 years ago, I mostly used my flowers for greetings cards, bookmark gifts and I framed some of my first pressed flowers (they still hang in my home today).
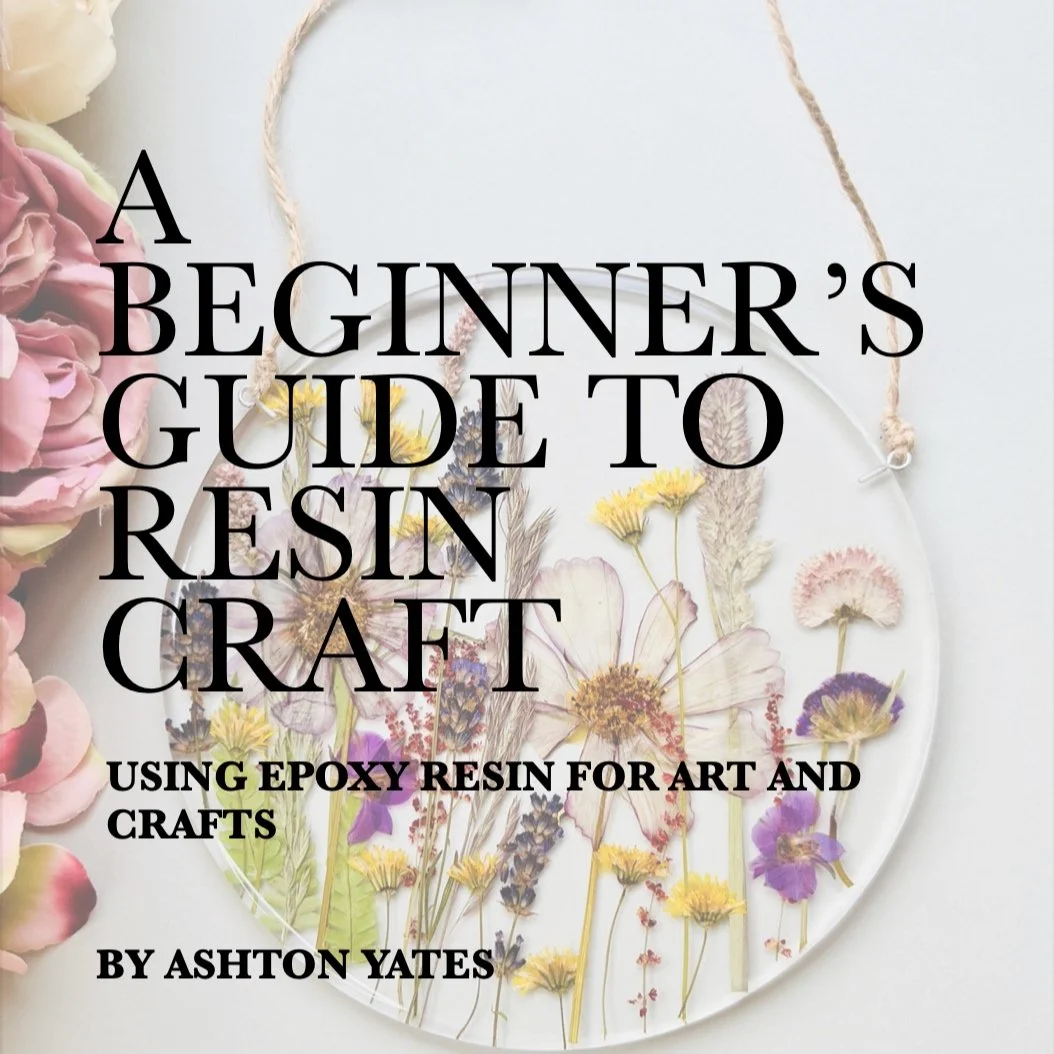
I began working with epoxy resin around 5 years ago after establishing Little Pressed Flower. Resin is a versatile medium to use to preserve flowers, but it is a whole other art form in itself. If you’d like to learn how to use epoxy resin for crafts, see my guidebook: ‘A Beginners Guide to Resin Craft’.
To Learn More about how to press flowers and achieve consistent and beautiful results, explore our online courses and helpful guidebooks.
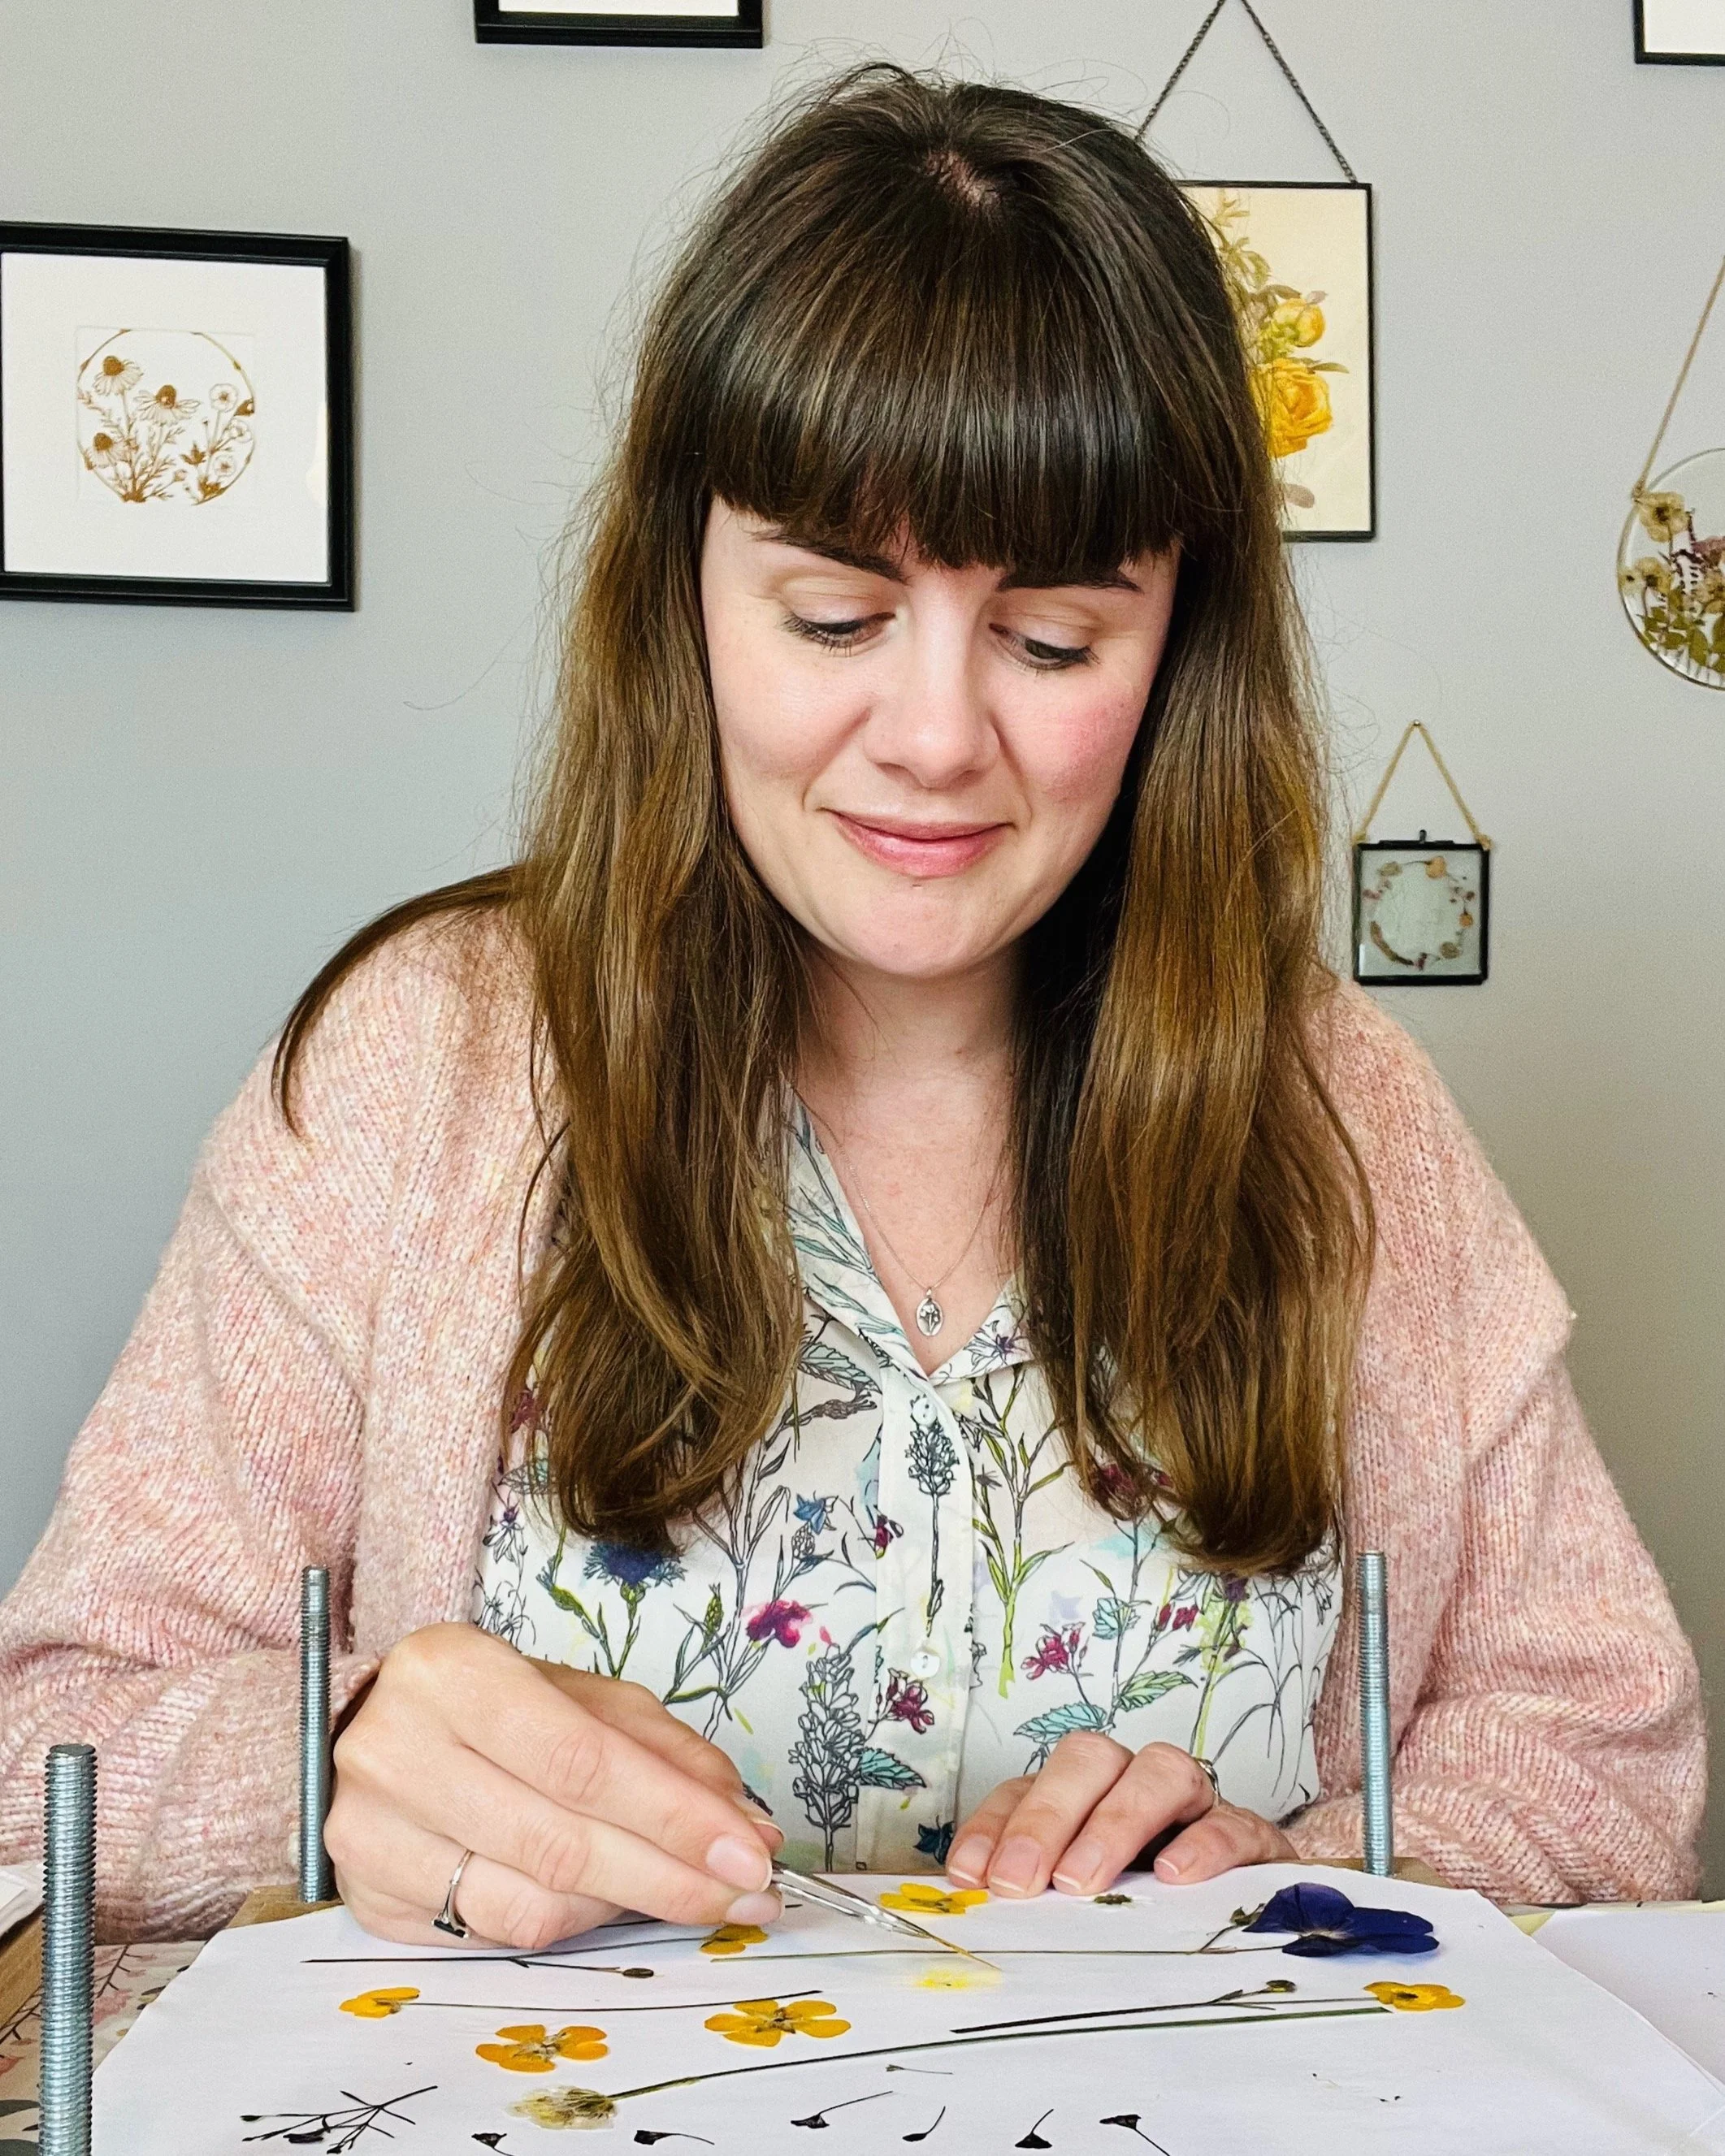
Ashton pressing flowers at her home in Cheshire, UK.